
What is a Snappi meeting?
A Snappi meeting is a video room with its own link. Teammates, guests and people with no Snappi account can all join the same room. Inside you can talk on camera, present your screen, draw on a shared whiteboard, chat, split into breakout rooms, record, and let Snappi take the notes.
A meeting is different from a call. A call is between two teammates who are online. A meeting has a link and can hold a group.
Start a meeting
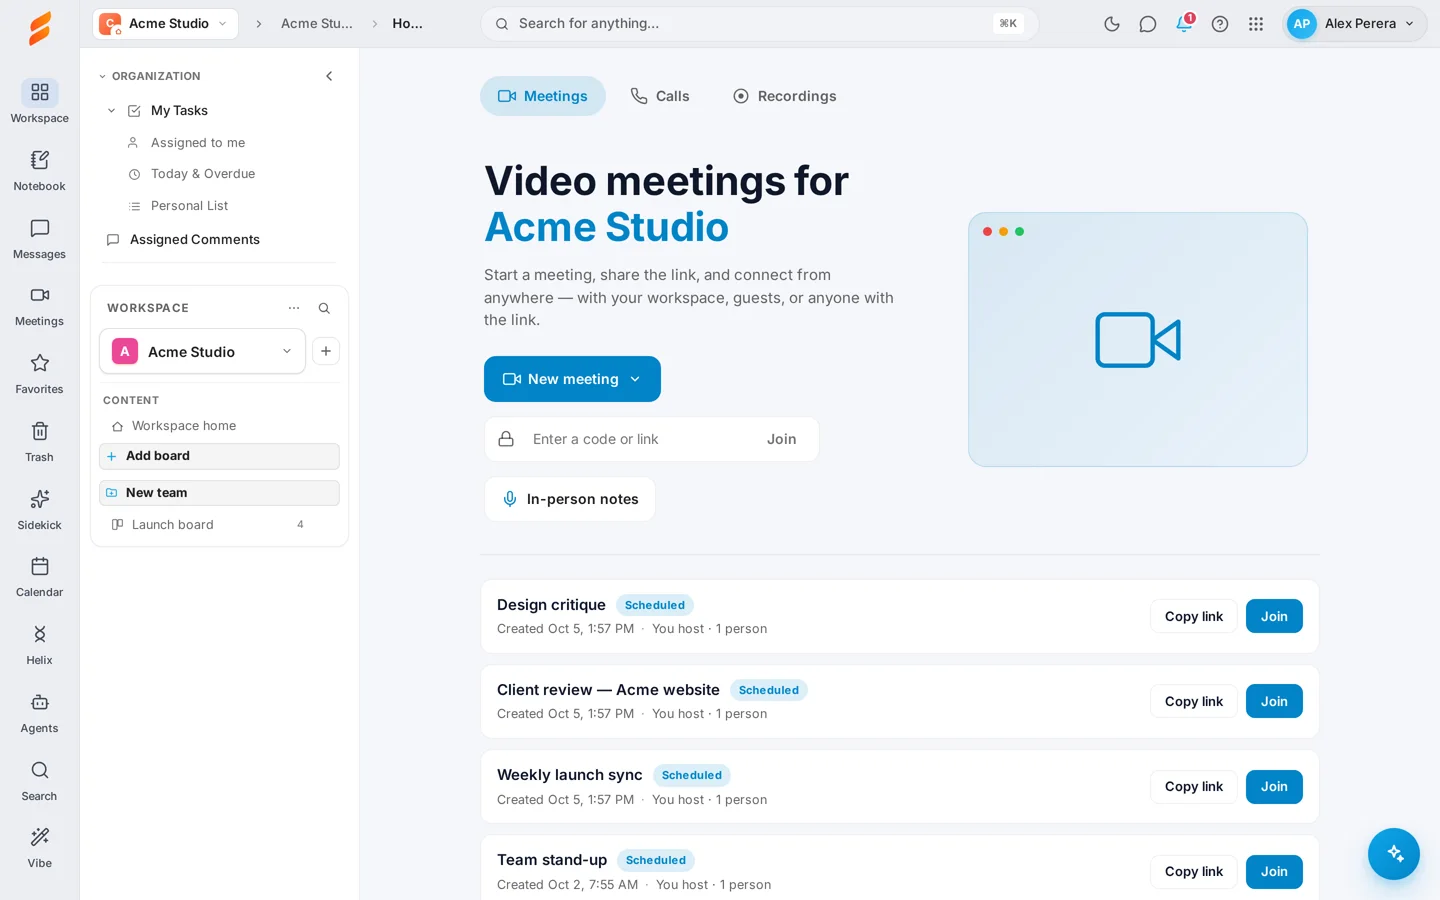
- Open Meetings in the left rail. New meeting is also on workspace home and at the top of every board.
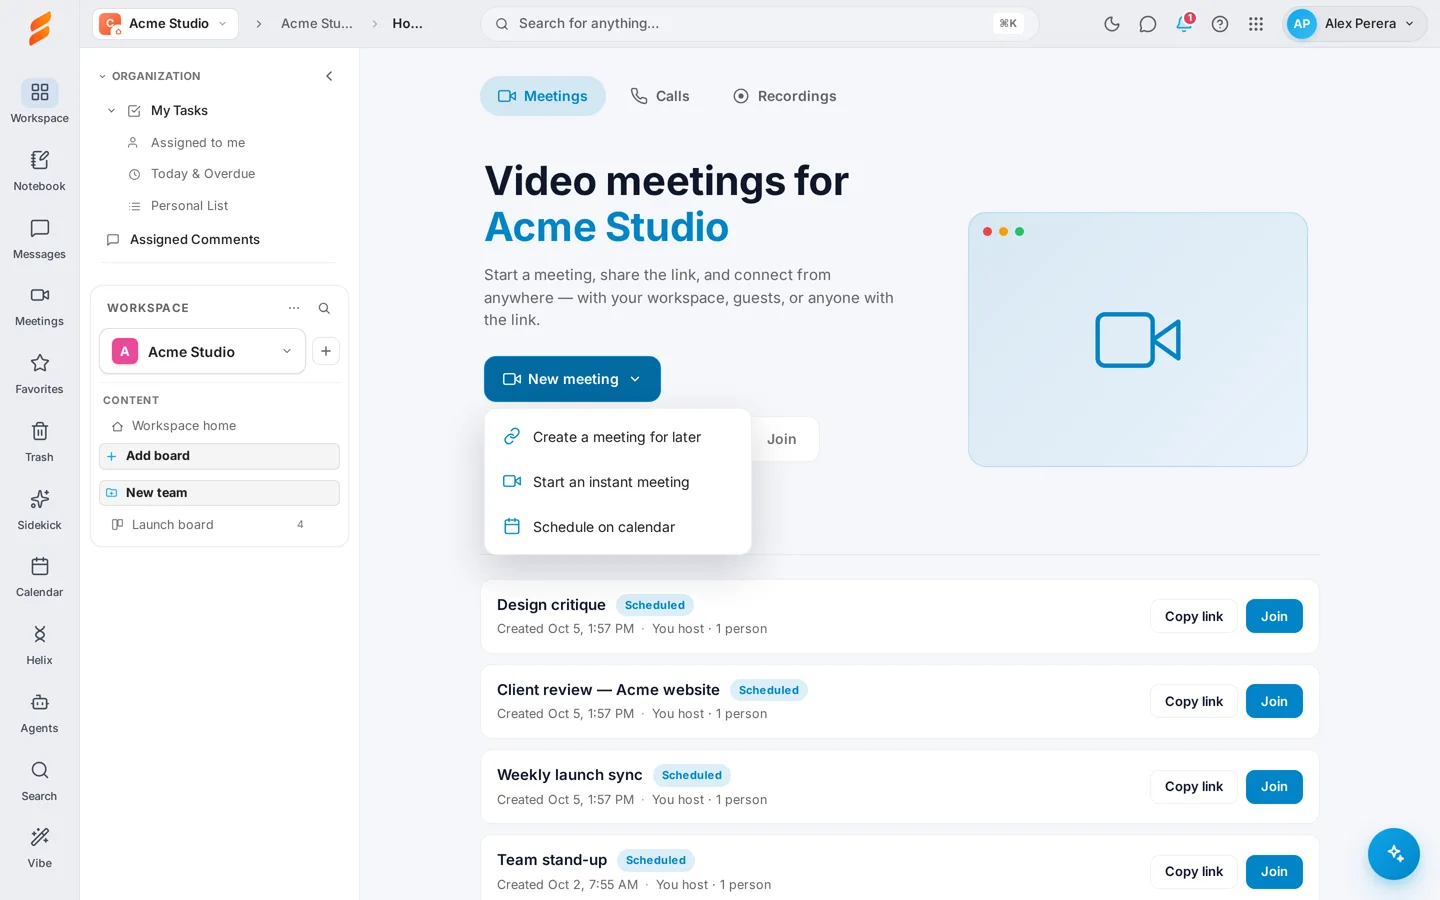
- Select New meeting, then Start an instant meeting.
- The meeting opens in a new window. Check your camera and microphone, then select Join now. You are the host.
- Open People and use Copy to copy the link, Add to calendar to download an invite, or type email addresses and select Email to send the link.
Every meeting link looks like snappi.now/meet/abc-defg-hij. The last part is the meeting code.
Plan a meeting for later
New meeting has two more choices:
- Create a meeting for later makes a meeting and shows its link, so you can send it now and meet later. It appears in your meetings list with Copy link and Join.
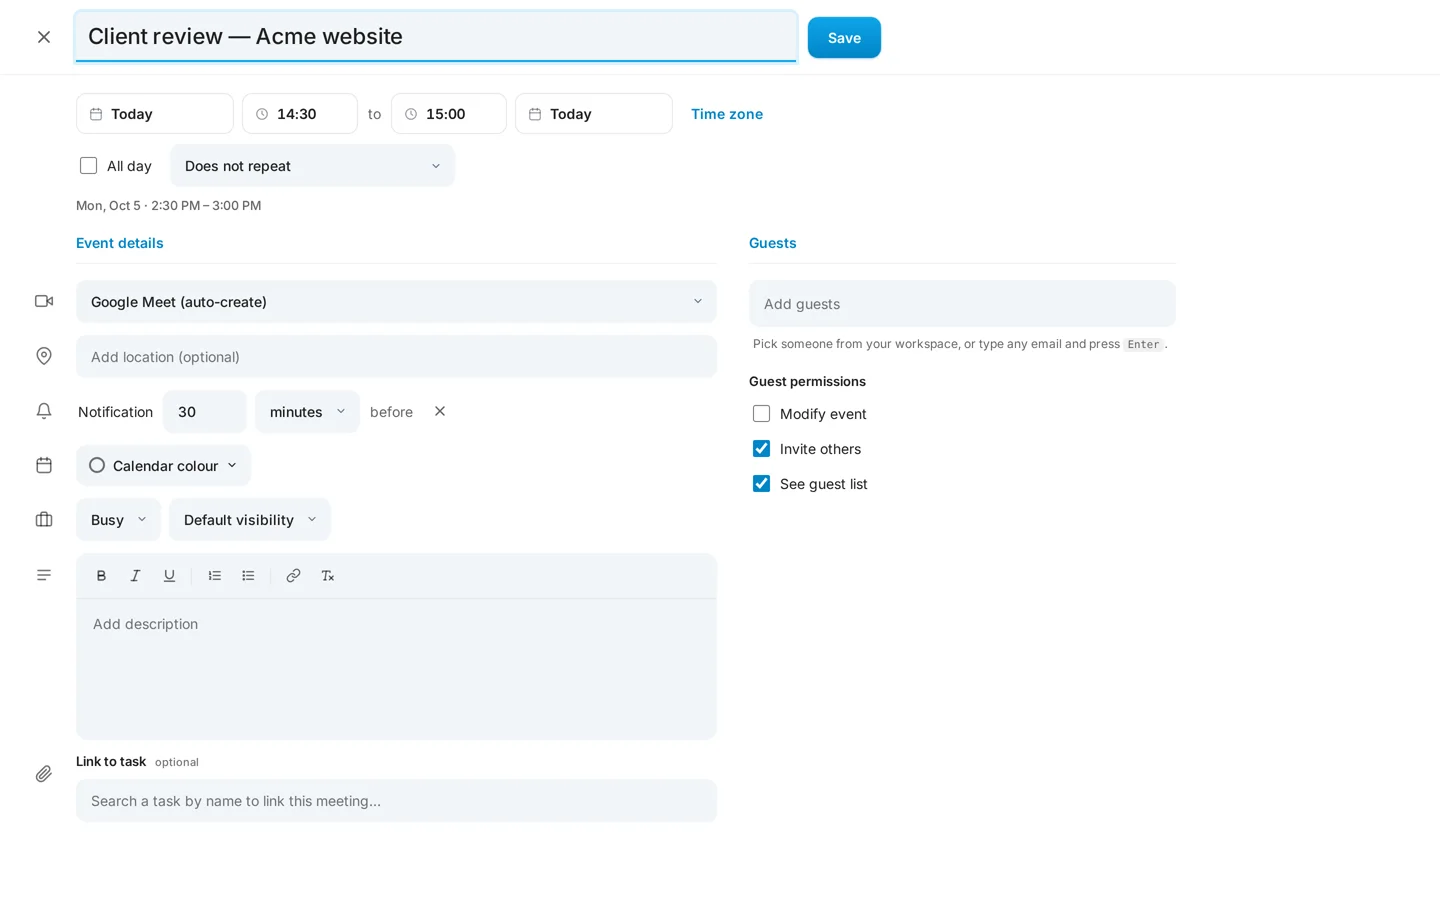
- Schedule on calendar opens the event form. Add a title, date and time, guests and a description, choose whether it repeats, link a task if you want, and select Save.
See Make room for the work for connecting Google, Outlook or Zoho Calendar.
Check your camera and microphone
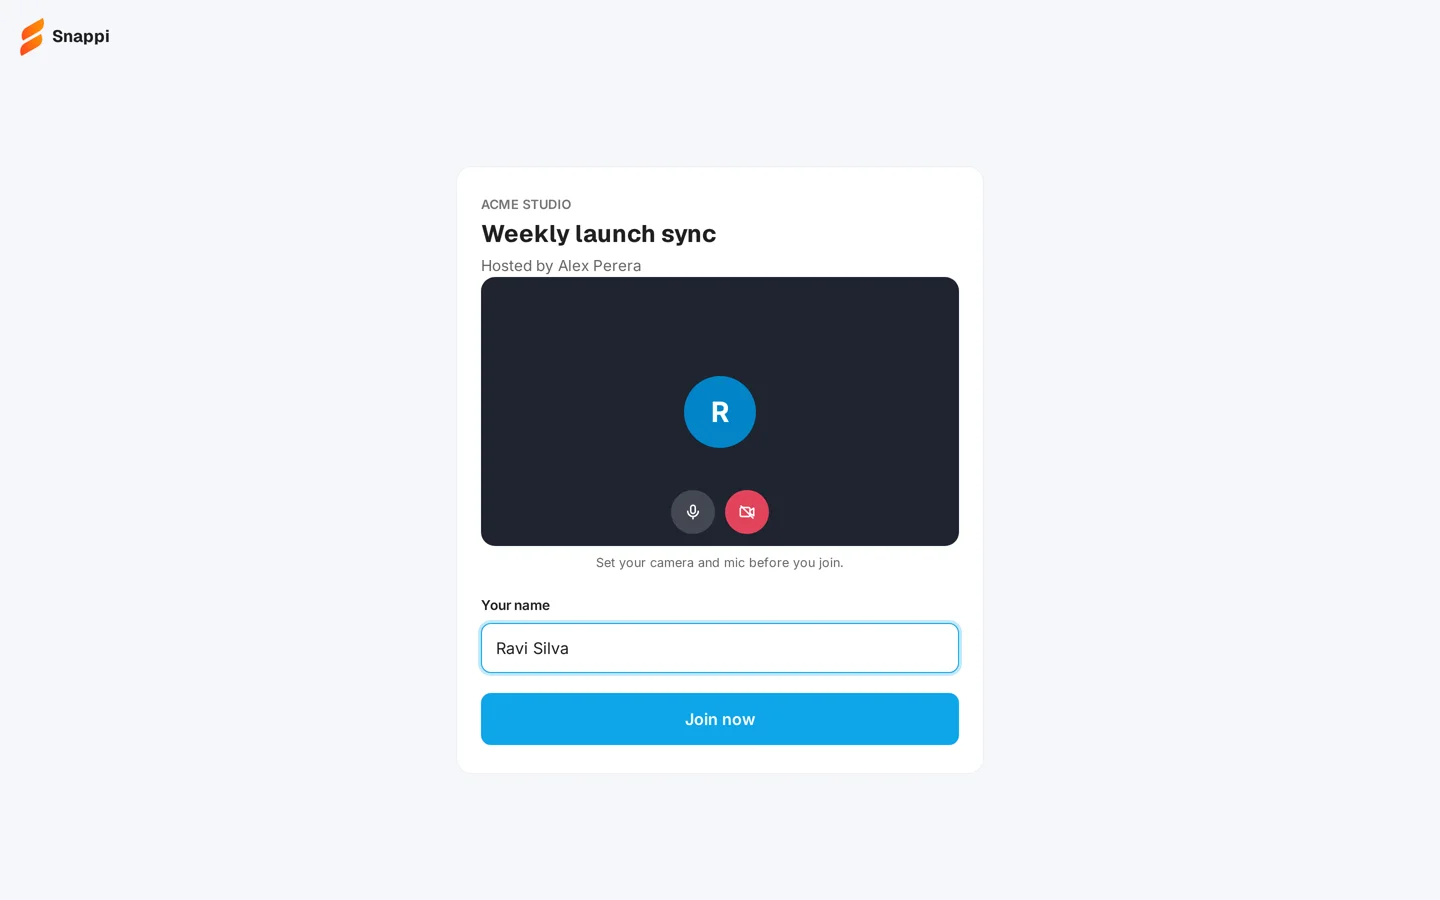
Before you enter, Snappi shows a preview of your camera. Use the two buttons on the preview to turn your microphone and camera on or off, then select Join now. Your browser asks for permission the first time; choose Allow.

Join a meeting
- With a link — open it in your browser.
- With a code — open Meetings, type the code or paste the link into Enter a code or link and select Join.
- From the list — select Join next to the meeting on the Meetings page or workspace home.
What happens next depends on who you are:
- A member of the workspace goes straight in.
- A Snappi user from outside the workspace joins as a guest and waits in the lobby.
- Someone with no Snappi account types a name, selects Join now and waits in the lobby.
Let people in from the lobby
When someone is waiting, the host sees a card at the top of the meeting with their name.
- Select Admit on the card to let them in.
- Or select View to open People, where everyone waiting is listed under Waiting to join.
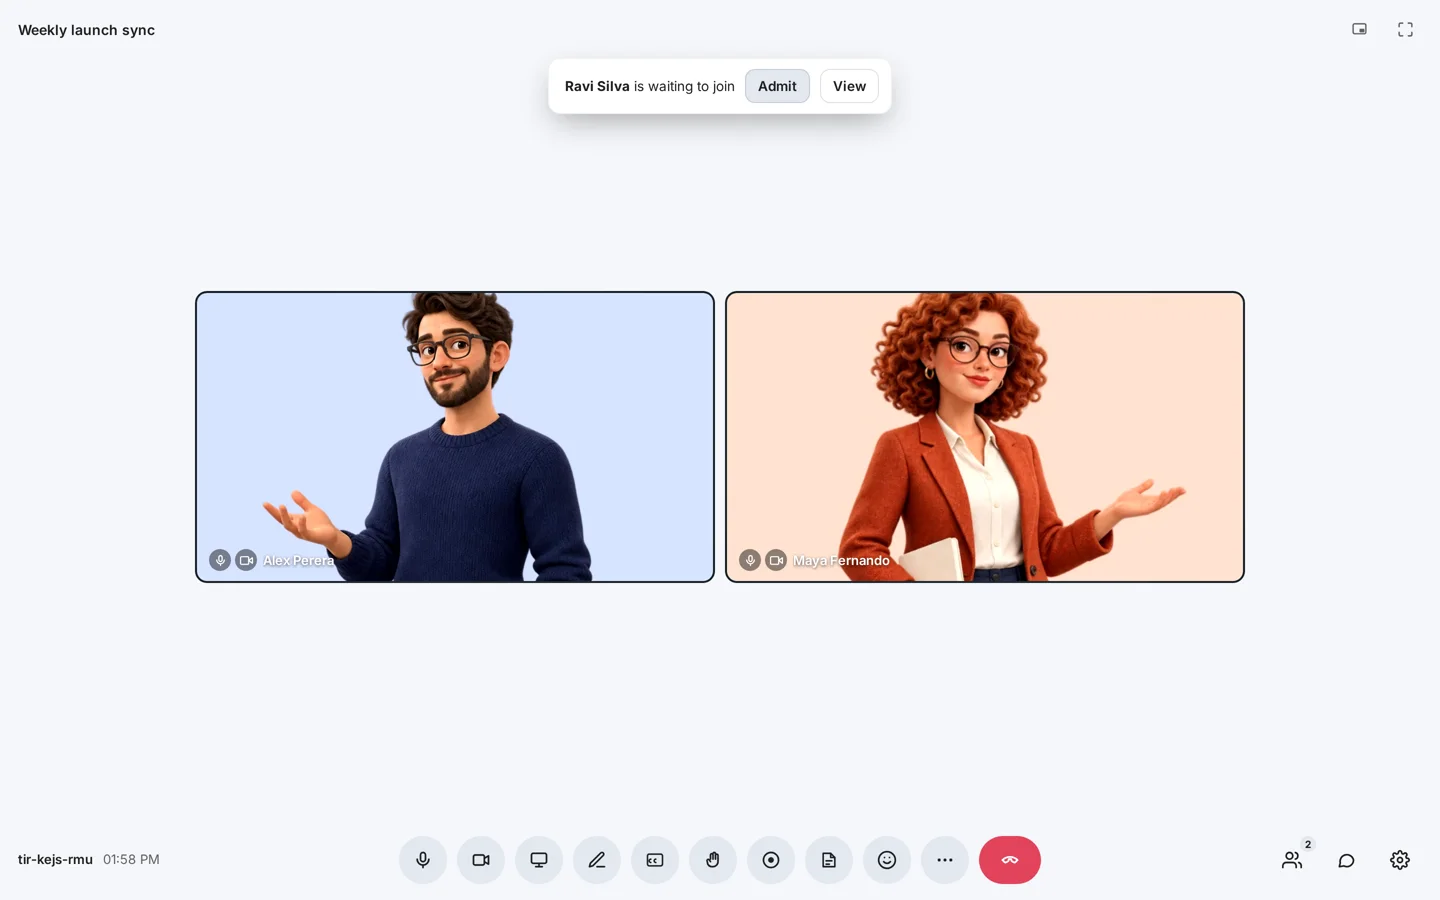
The person waiting sees Waiting for the host to let you in… until they are admitted.
Use the meeting controls
The bar at the bottom holds the controls, from left to right:
- Microphone — mute or unmute.
- Camera — turn your camera on or off.
- Present now — share your screen.
- Whiteboard — open the shared whiteboard.
- Captions — show what is said as text.
- Raise hand — let the host know you want to speak.
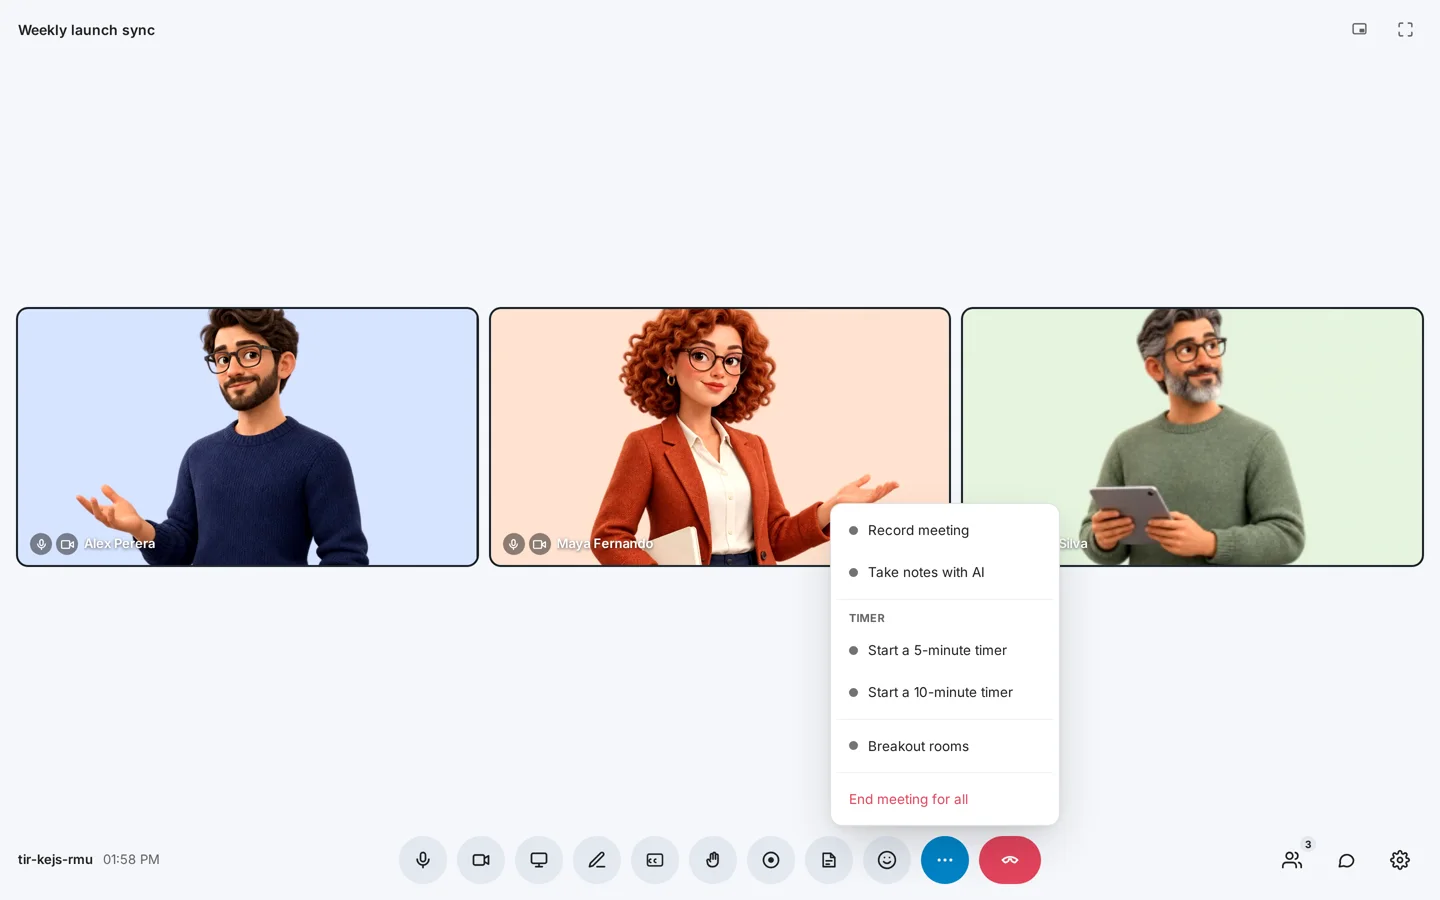
- Record meeting and Take notes with AI — host only.
- Send a reaction — an emoji that floats up for everyone.
- More options — timer, breakout rooms and End meeting for all, host only.
- Leave call — the red button.
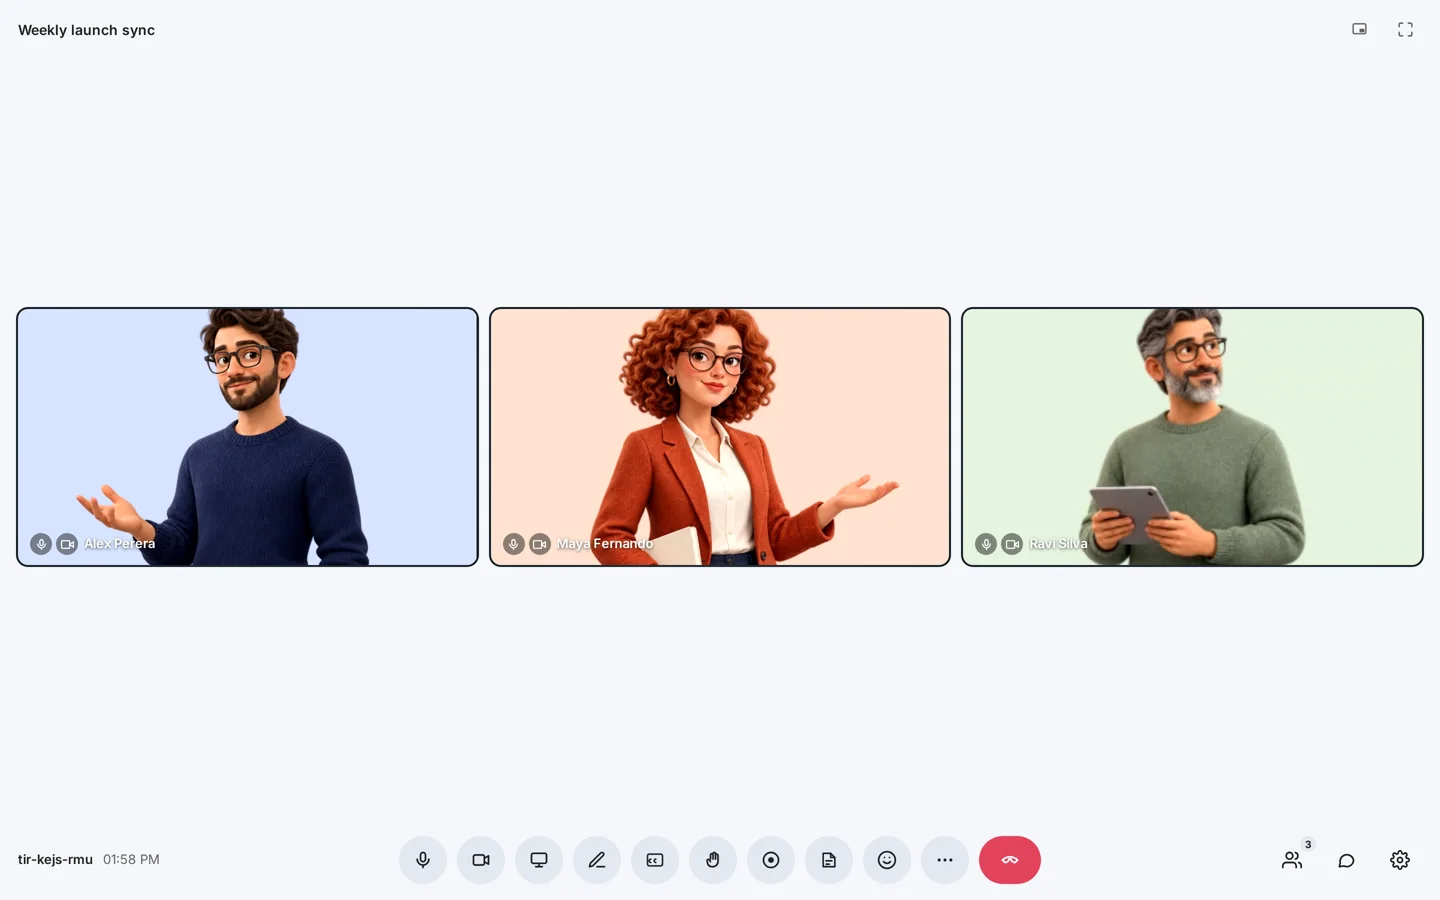
People, Chat and Settings are at the bottom right. Picture-in-picture and full screen are at the top right.
People and chat
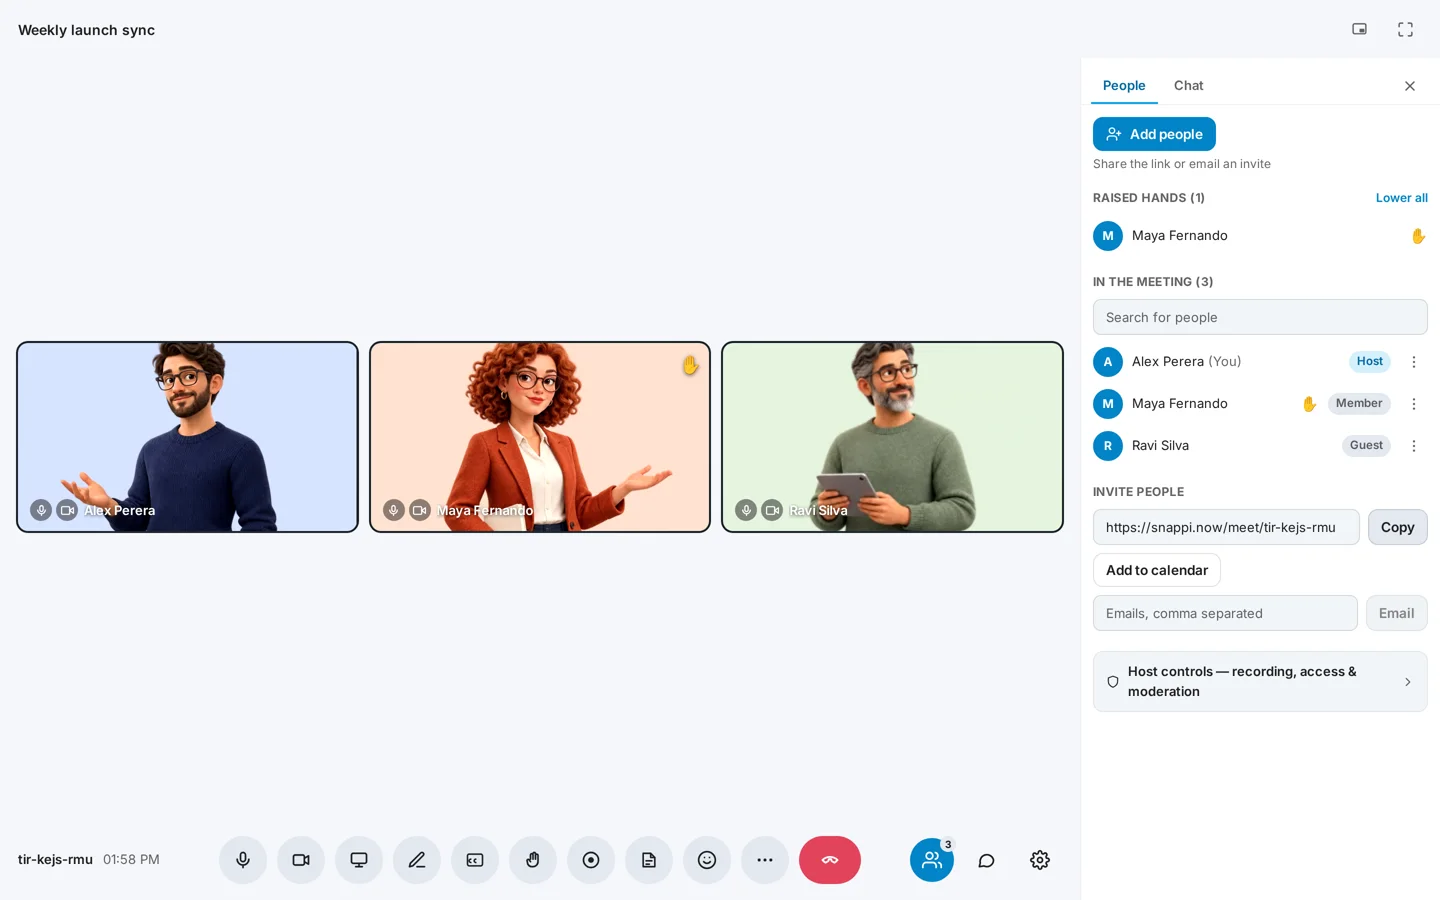
Open People to see who is in the meeting, with a label for Host, Member or Guest. Raised hands are listed at the top; the host can select Lower all. Use the three dots next to a person to pin them or, as host, remove them.
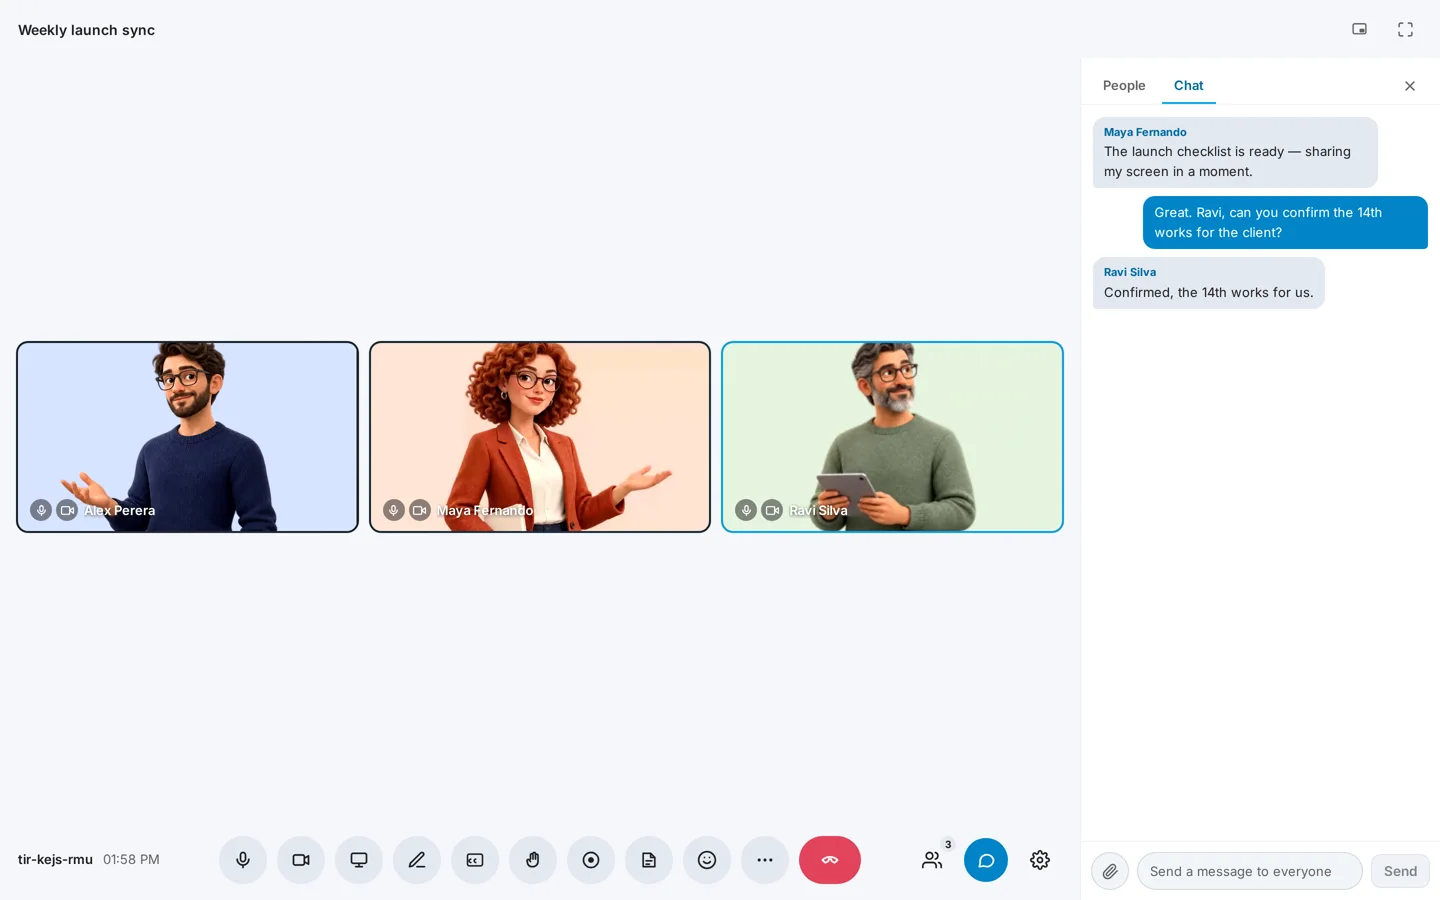
Open Chat to write to everyone in the meeting. Attach a file with the paperclip, by dragging it onto the panel, or by pasting an image. One file per message, up to 25 MB.
Present your screen
- Select Present now.
- Choose a screen, a window or a browser tab in the box your browser shows, then confirm.
- Your screen takes the main spot for everyone. Select Stop presenting when you are done.
Anyone can select the maximize button on a shared screen, a person or the whiteboard to make it fill the meeting.
Draw on the whiteboard
- Select the Whiteboard button on the control bar. The board opens for everyone.
- Pick a pen colour and a thickness, then draw. Everyone can draw at the same time.
- Use Eraser to rub out, Undo to remove your last stroke, and Save as image to download the board.
- Clear the board for everyone wipes it after you confirm. Close board closes it for everyone.
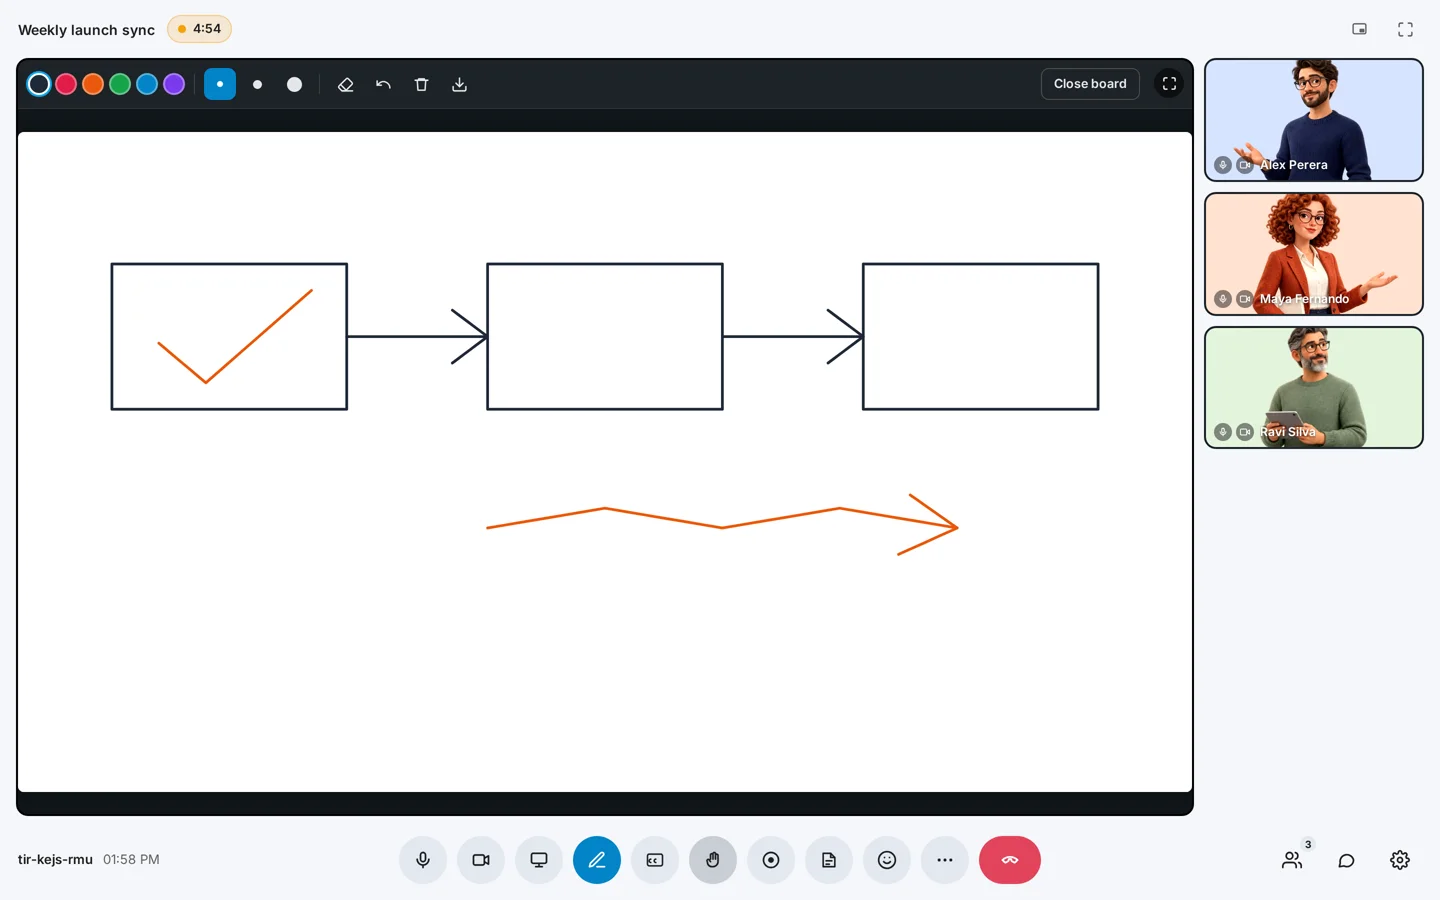
If the meeting is being recorded, the whiteboard is recorded too.
Split into breakout rooms
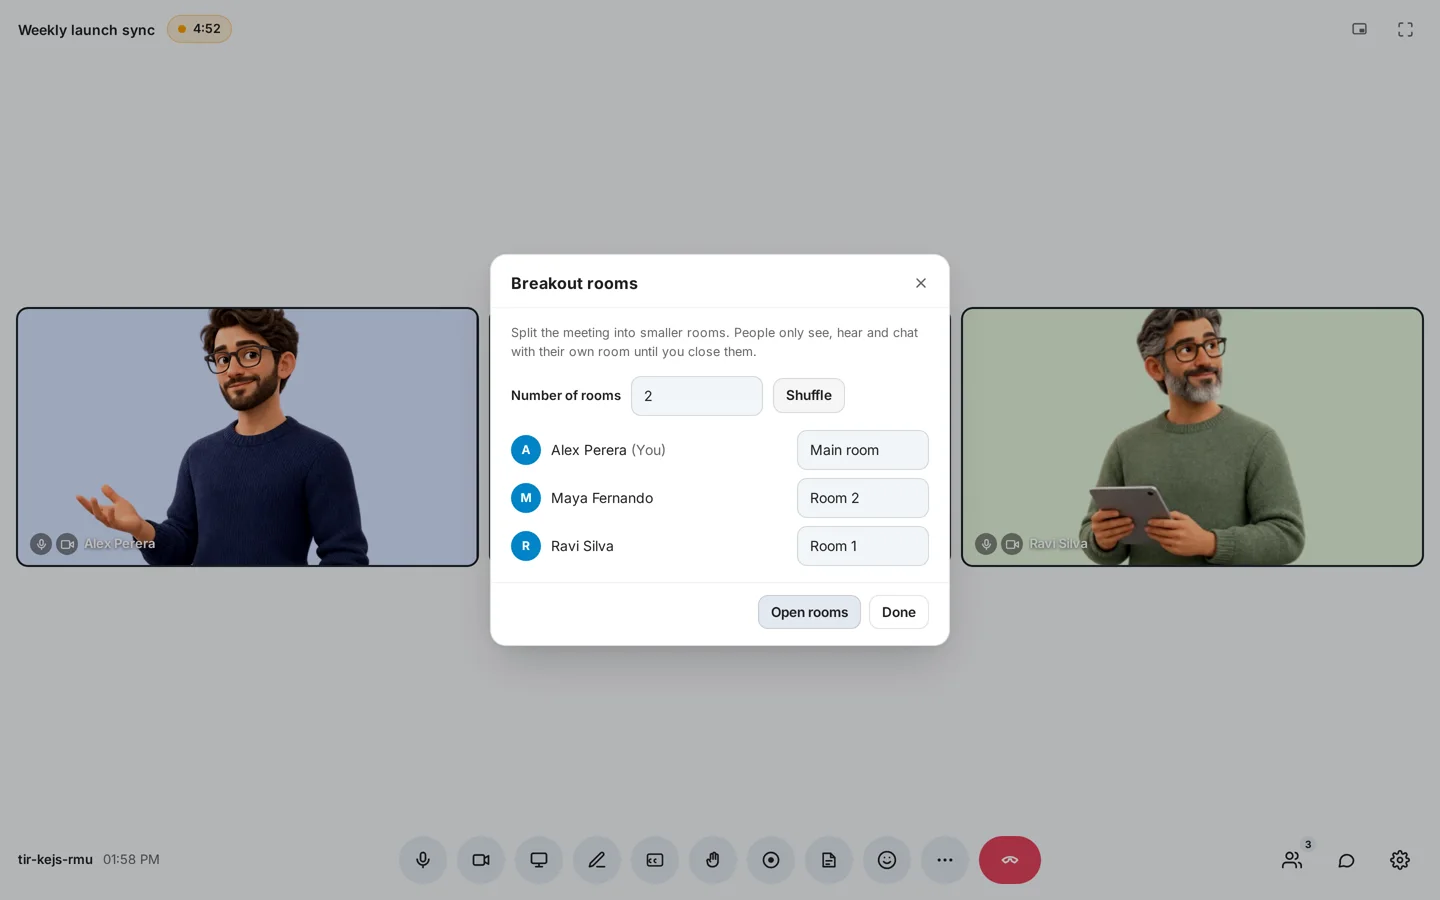
The host can split the meeting into smaller rooms. People only see, hear and chat with their own room until the rooms are closed.
- Select More options, then Breakout rooms.
- Set the Number of rooms. Select Shuffle to spread people across them, or choose a room for each person.
- Select Open rooms.
- To bring everyone back, open Manage breakout rooms and select Close all rooms.
Change what you see
- Pin — select a person’s tile to keep them in the main spot.
- Maximize — make one tile, a shared screen or the whiteboard fill the meeting.
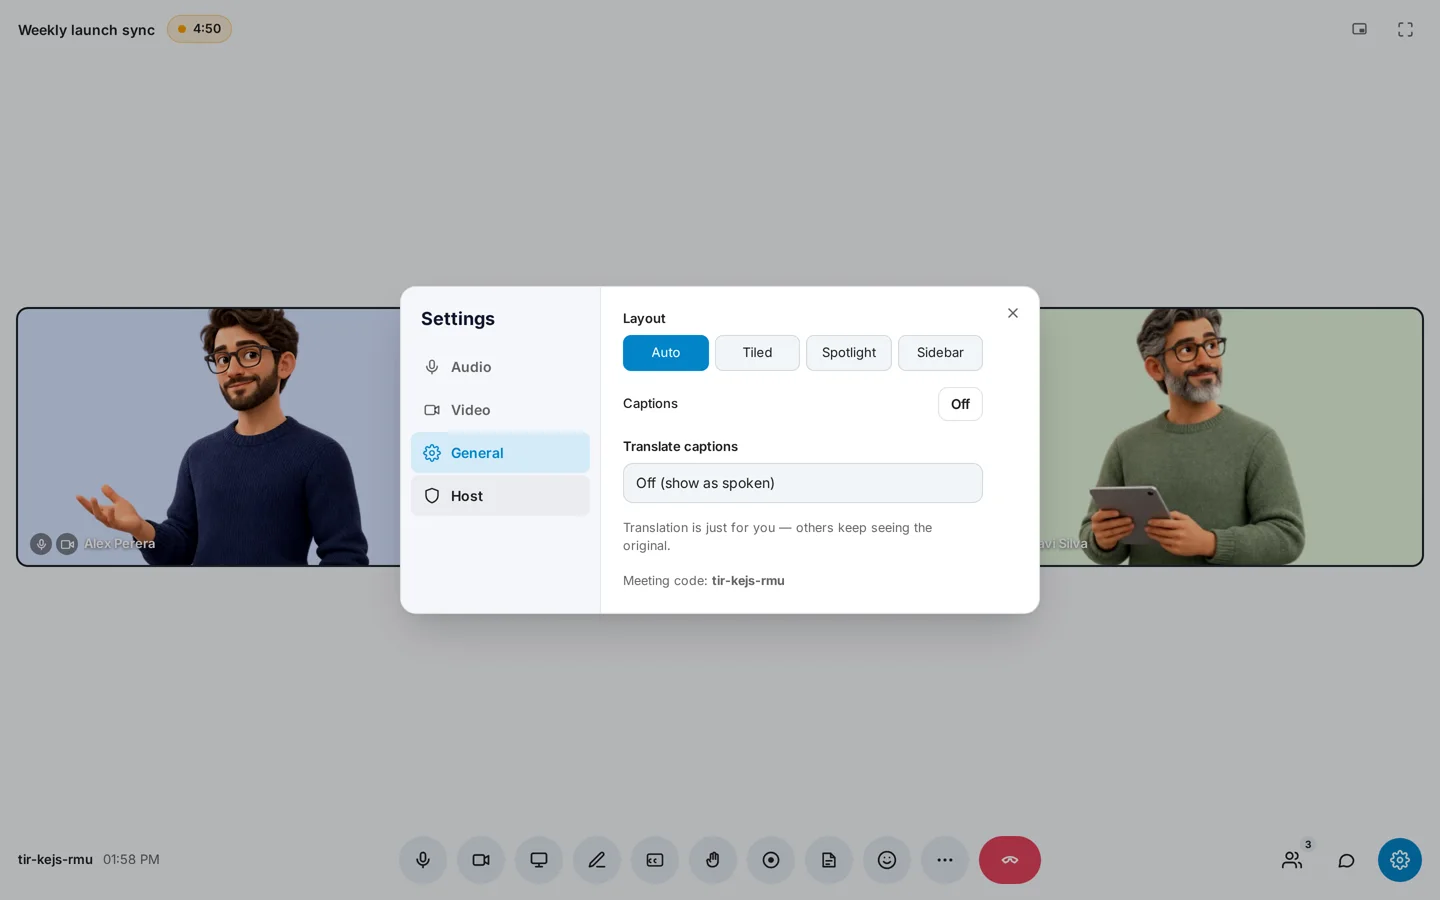
- Layout — open Settings → General and choose Auto, Tiled, Spotlight or Sidebar.
- Full screen and Picture-in-picture — the two buttons at the top right. Picture-in-picture keeps the meeting in a small window while you work elsewhere.
- Background blur — open Settings → Video. The blur happens on your device.
- Microphone, speaker and camera — choose which device to use in Settings → Audio and Video.
Captions and translation
Select Captions on the control bar to see what people say as text at the bottom of the meeting. Captions need a browser that can turn speech into text; Chrome works best.
To read captions in another language, open Settings → General → Translate captions and choose a language. Translation is only for you; everyone else keeps seeing the original.
Record a meeting
Meetings and recording start on Starter. Free does not include video meetings, and from Starter a meeting has no time limit. See the packages.
- As host, select Record meeting on the control bar.
- Everyone hears “Recording in progress” and sees a Recording in progress label for as long as it runs.
- Select the button again to stop, or end the meeting.
Snappi then puts the shared screen, the whiteboard, the cameras and the sound into one video. This takes a few minutes; a one-hour meeting takes about eight. The recording appears by itself when it is ready.
Take notes with AI
- As host, select Take notes with AI on the control bar.
- Everyone, including guests, sees a banner saying the meeting is being recorded for AI notes, and the AI Notetaker appears in the meeting.
- Turn it off at any time. Nothing is written for the part of the meeting before you turned it on or after you turned it off.
When the meeting ends, Snappi writes a transcript with each speaker’s name and a short summary into a new note in Notebook, titled with the meeting name and date. From there you can turn points into tasks; see Take meeting notes with AI.
AI notes use your notes pages or the workspace’s AI credits, the same as voice notes in Notebook.
Find recordings and notes
- Open Meetings and select the Recordings tab. Recordings are grouped by date; use From to pick a date range.
- On the meetings list, select the recordings button on a meeting’s row to see only that meeting’s recordings.
- Select Play to watch or Download to save the file. The host can select Share link to copy a link that works for anyone, signed in or not, Stop sharing to switch that link off, and Delete to remove the recording.
- A Notes label on a meeting means AI notes were saved to Notebook.
Workspace home has the same Meetings and Recordings tabs.
Host controls
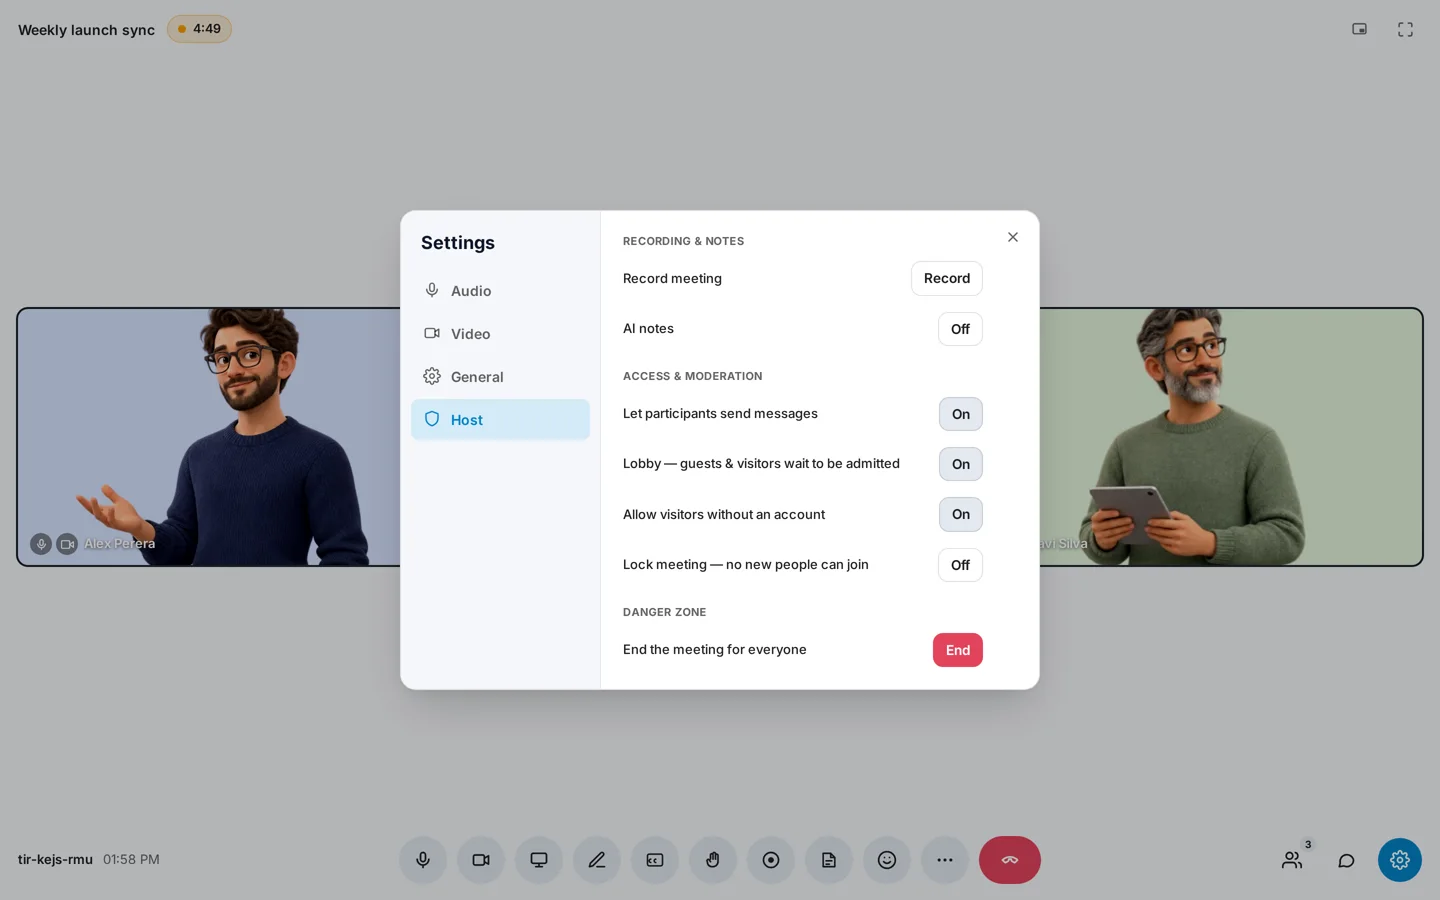
Open Settings → Host, or Host controls at the bottom of the People panel:
- Let participants send messages — turn chat off for everyone except the host.
- Lobby — guests and visitors wait to be admitted. Turn it off to let them straight in.
- Allow visitors without an account — turn it off so only Snappi users can join.
- Lock meeting — no new people can join.
- End the meeting for everyone — closes the room.
The host can also start a 5-minute or 10-minute timer from More options. Everyone sees the countdown at the top.
Join from a phone
Open the meeting link in your phone’s browser; the meeting uses a layout made for small screens. In the Snappi app for iPhone and Android, open Meetings to join inside the app, with the waiting room, people, chat, raised hands and reactions. See Snappi on your phone.
If something is not working
- Nobody can see or hear me — allow the camera and microphone for snappi.now in your browser’s site settings, then check the device chosen in Settings → Audio and Video.
- “Waiting for the host to let you in…” does not go away — the host has not admitted you yet. Message them another way if it takes long.
- I cannot join — the meeting may be locked, ended, or closed to visitors without an account. Ask the host.
- There is no Record or AI notes button — only the host has them.
- Captions do not appear — your browser cannot turn speech into text. Try Chrome.
- There is no Meet option — video meetings start on Starter. Ask a workspace owner to move to Starter in Settings → Billing.
- There is no Record meeting button — recording is on Starter and above.
- The recording is not in the list yet — it is still being put together. Leave the page open or come back in a few minutes.
- “Reconnecting…” — your connection dropped. Snappi rejoins by itself when it returns.
Keep exploring
See all Snappi guides