
Step 1 of 18
Open signup
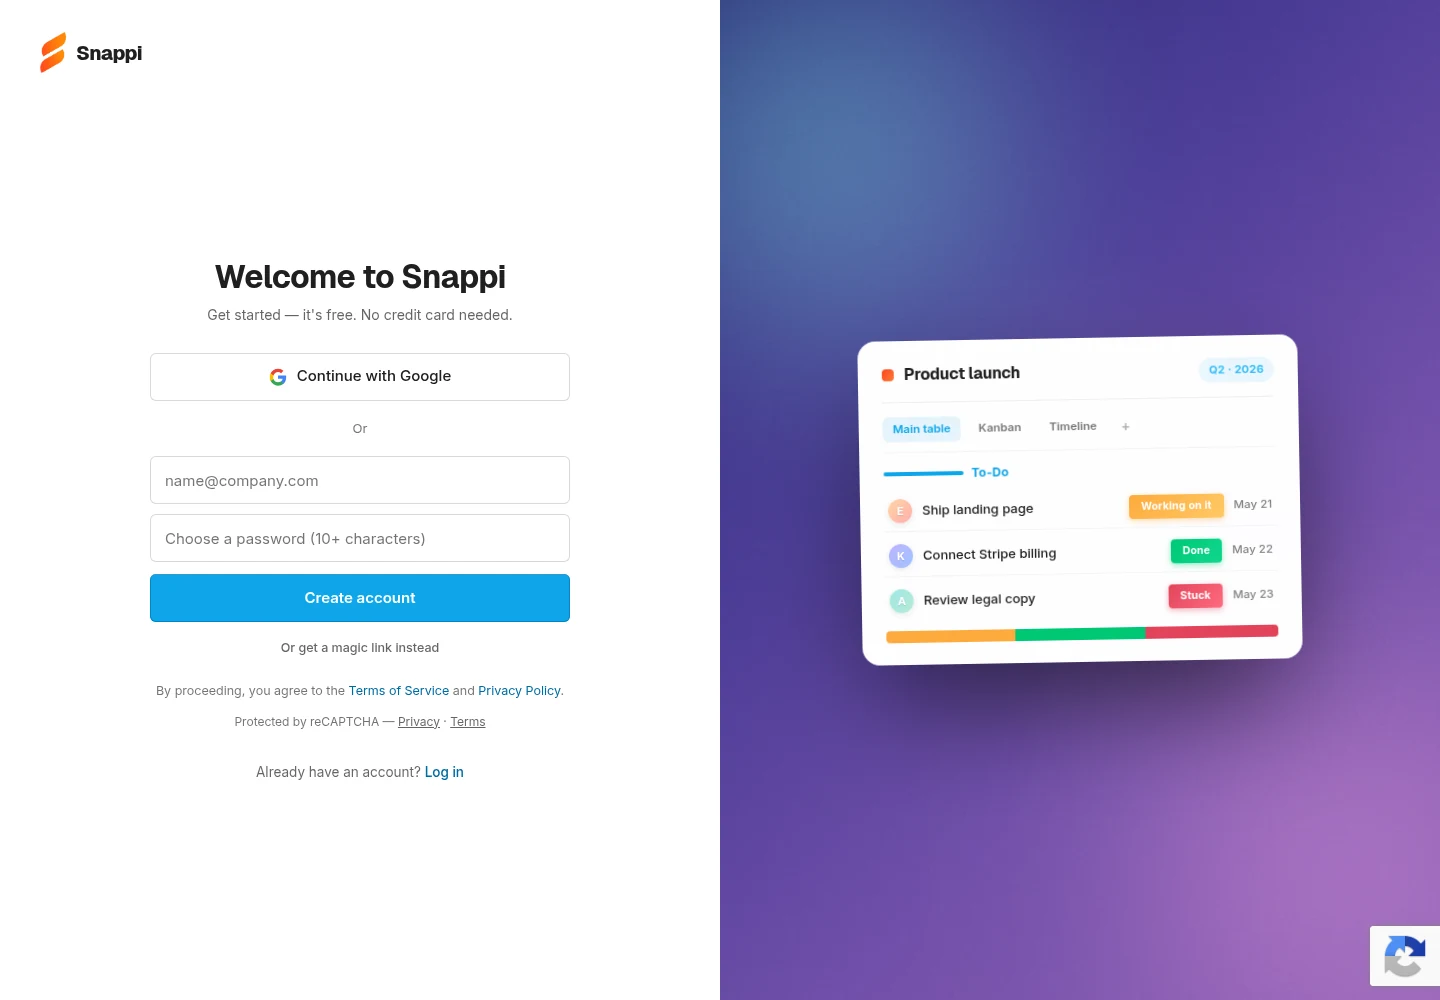
Open https://snappi.now/signup or select Get started on the homepage. This guide follows email-and-password signup.
Step 2 of 18
Create your account
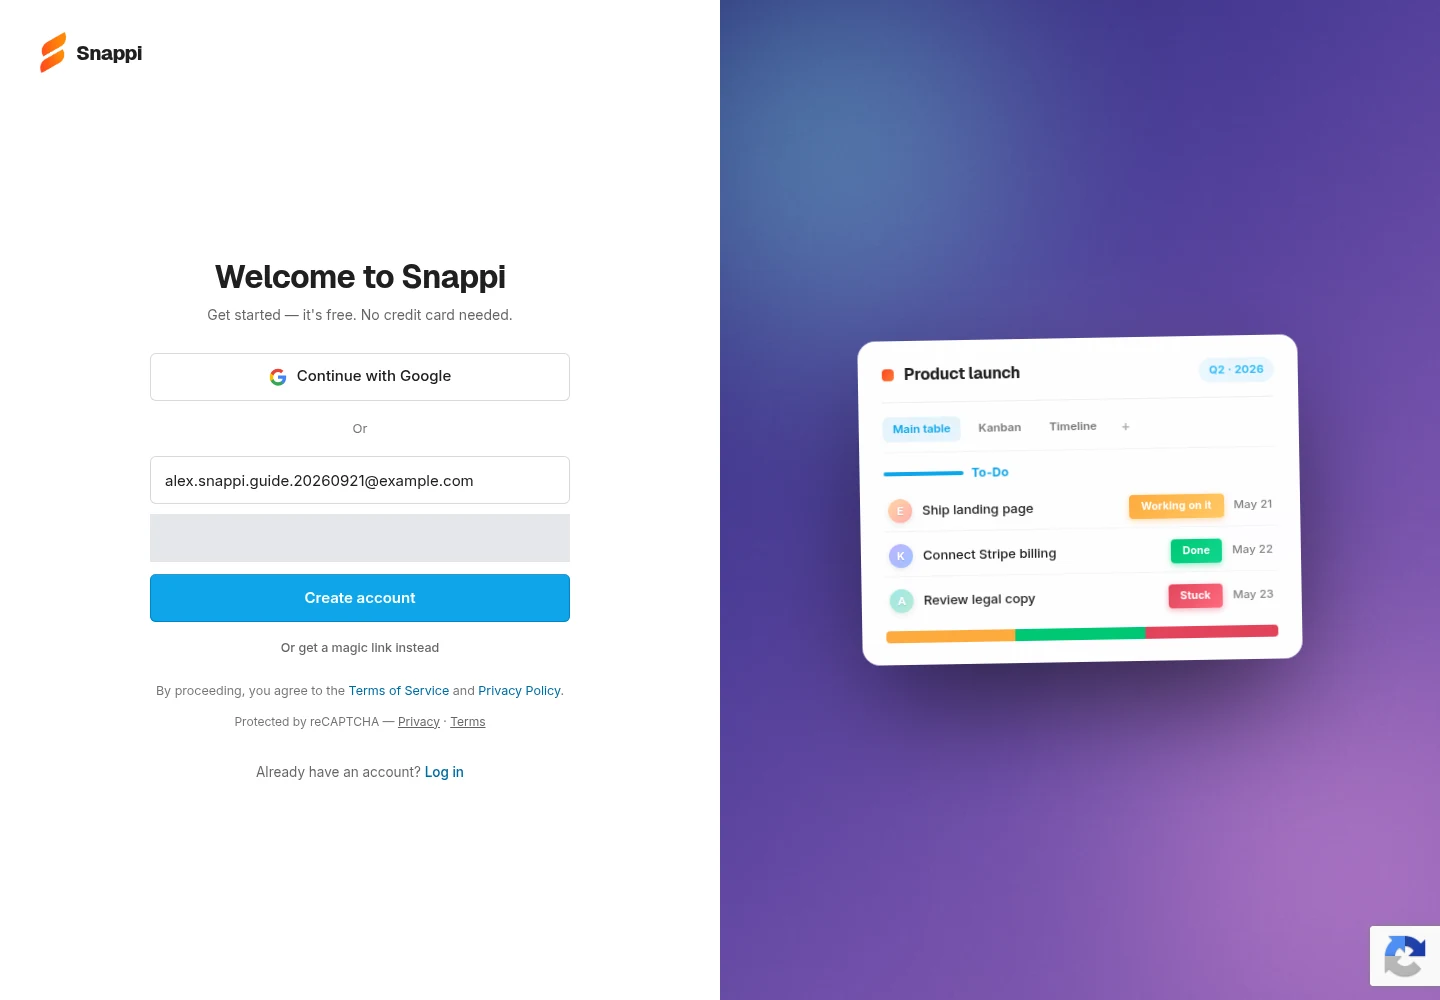
Enter an email address you can receive messages at and a password of at least 10 characters. Select Create account. The fictional example email shown here is for documentation only; use your own email. The password is concealed in this capture.
Step 3 of 18
Verify your email
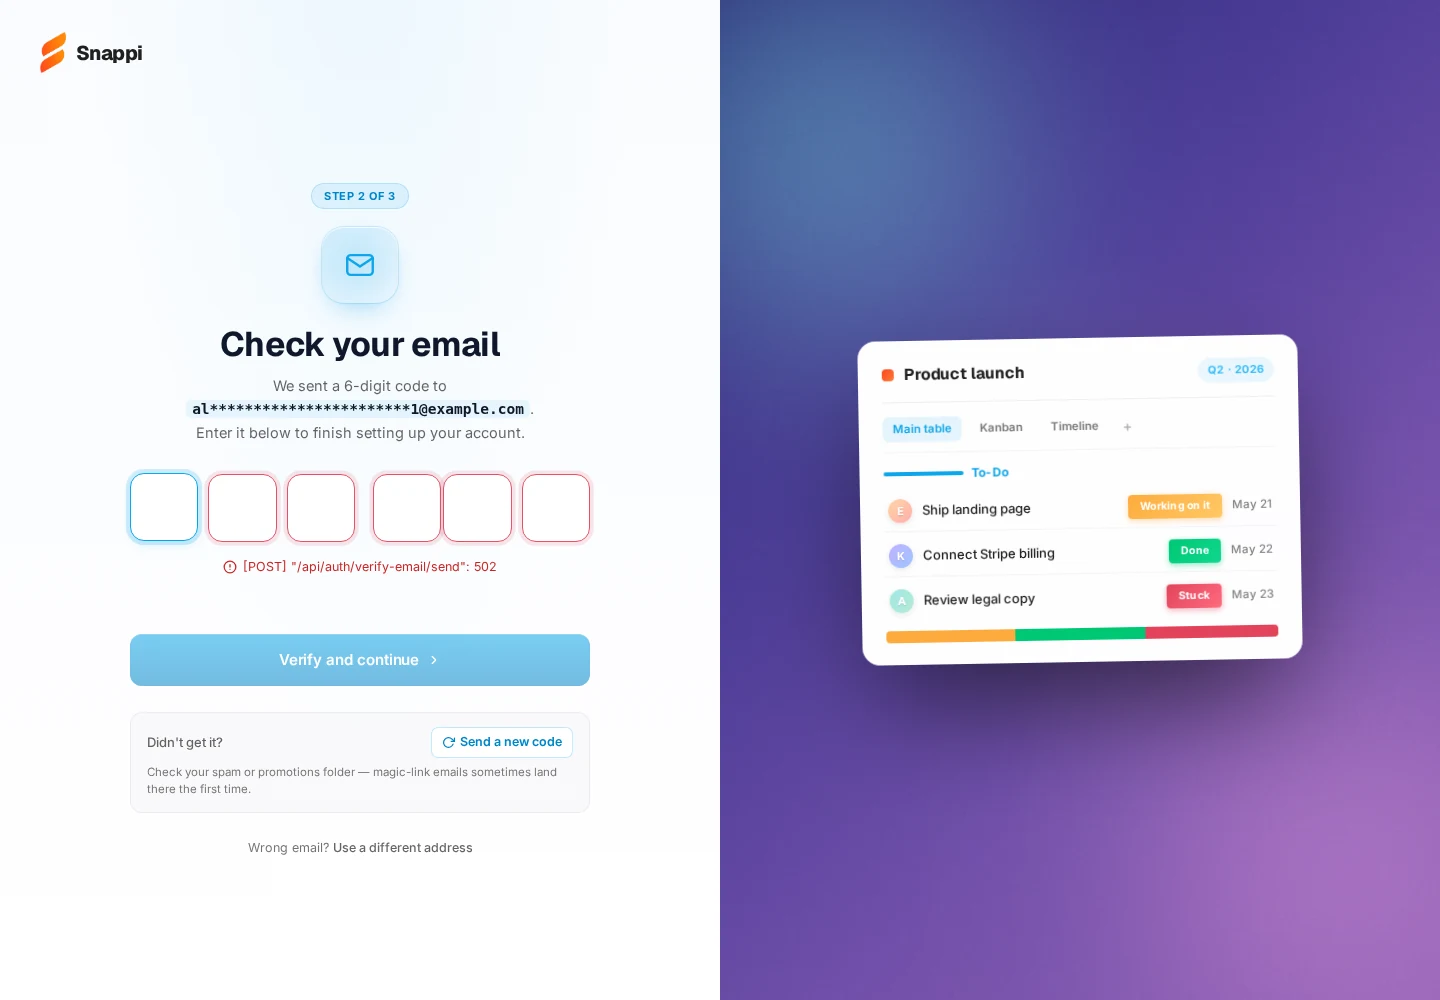
Enter the six-digit code sent to your email address, then select Verify and continue if the page does not continue automatically. Check your spam folder if it does not arrive. If you see a delivery error like the one in this example, use Send a new code or contact support.
Step 4 of 18
Choose your purpose and role
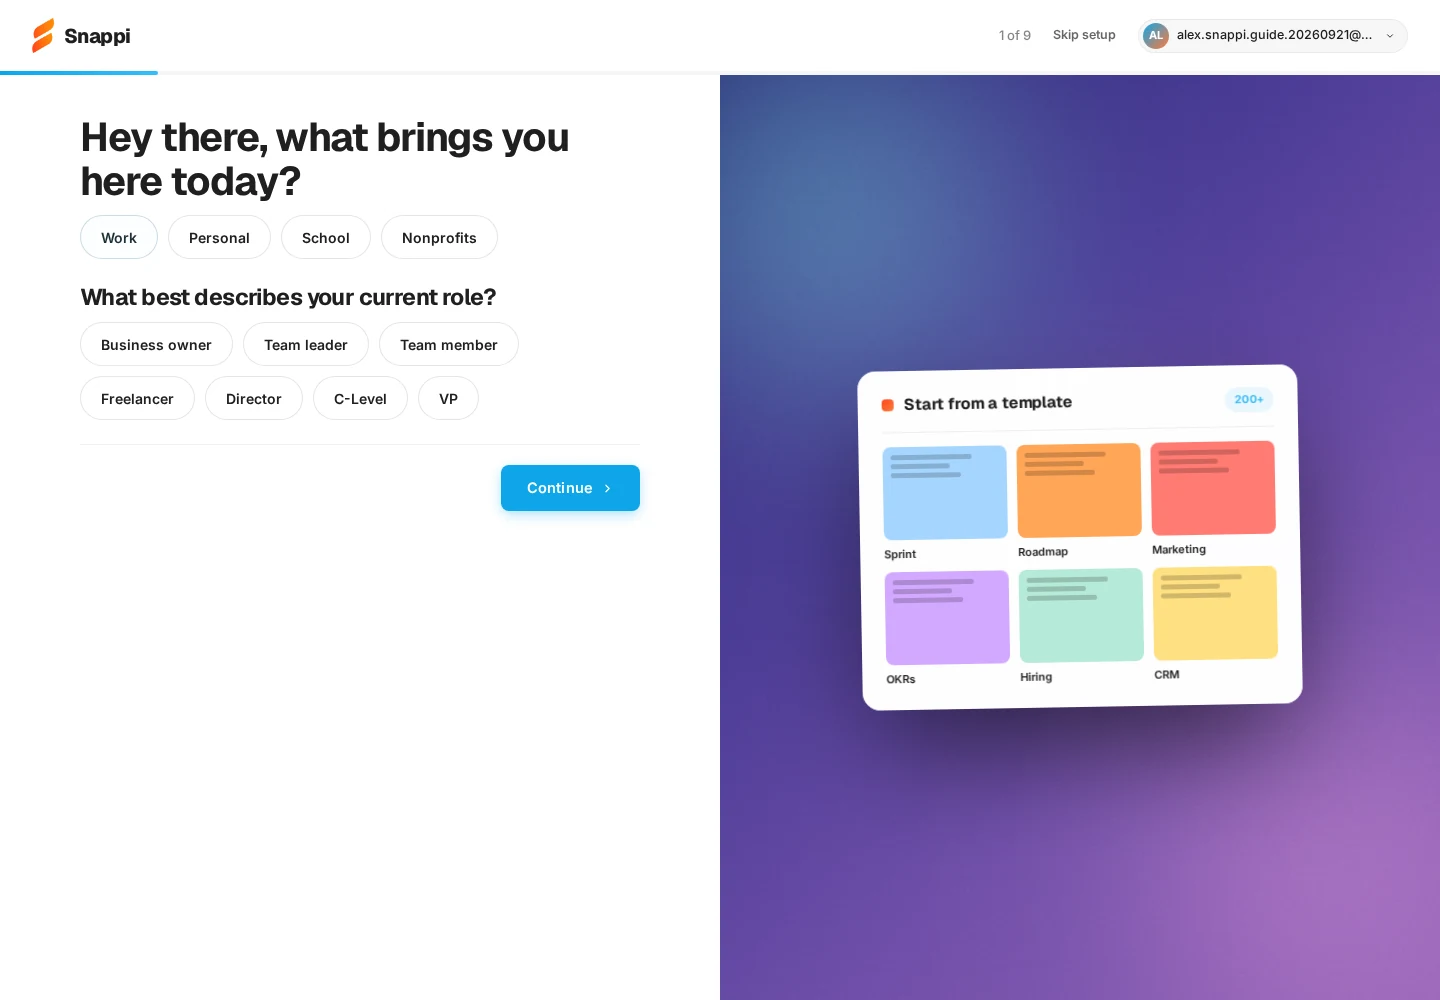
Select the options that describe you. Our example uses Work and Team leader. Select Continue.
Step 5 of 18
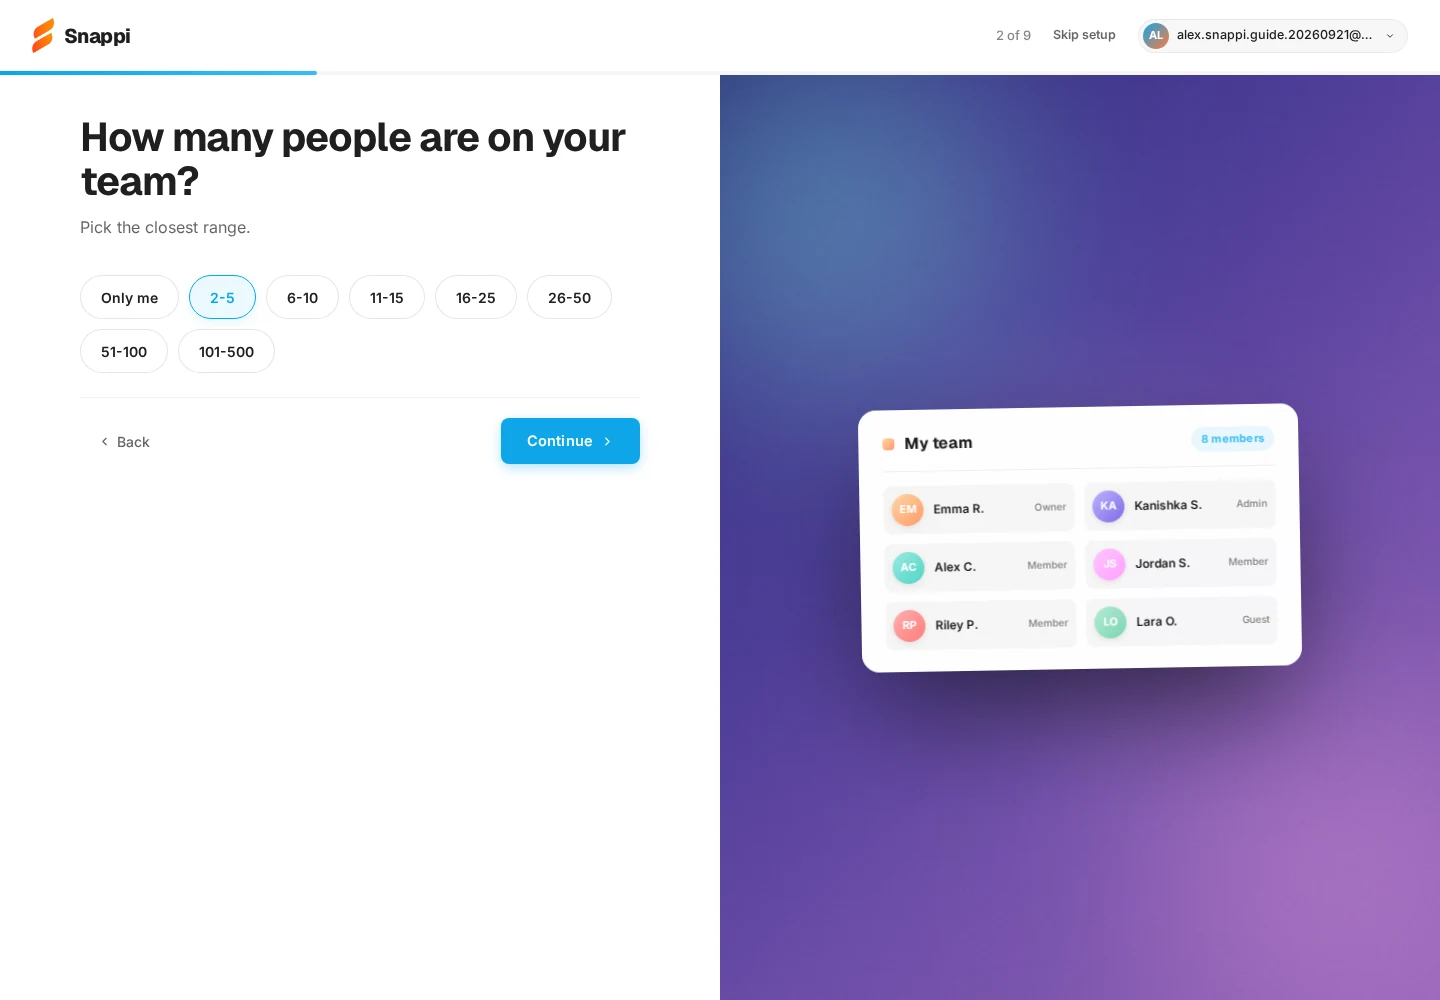
Choose your team size
Select the closest range, then Continue. The example uses 2–5. This preference does not send invitations.
Step 6 of 18
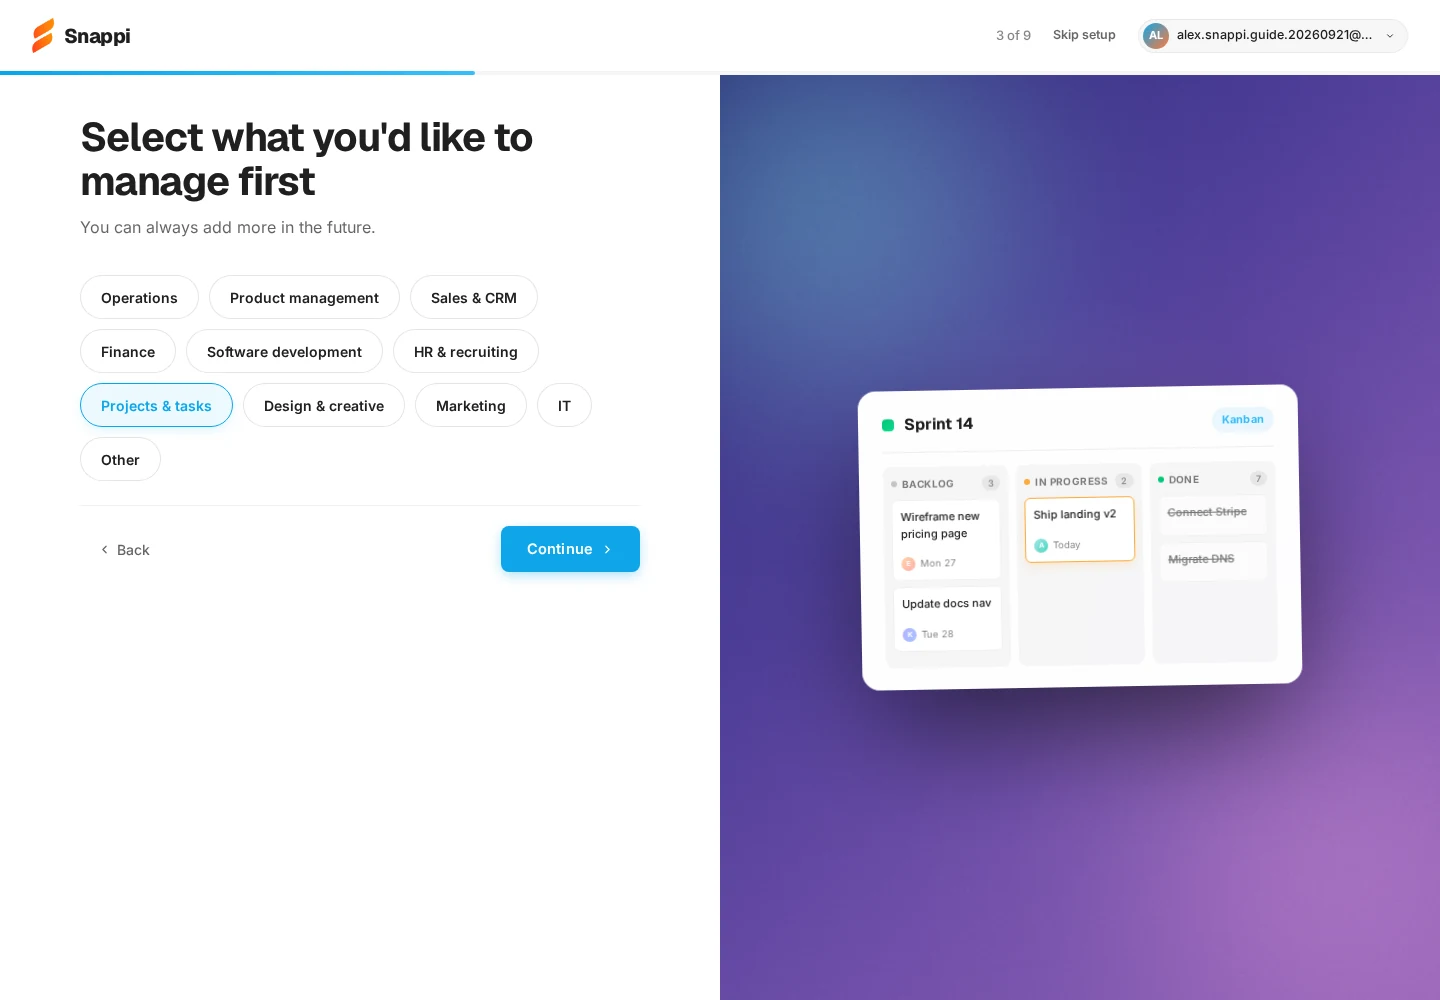
Choose your work focus
Select what you want to manage first. We chose Projects & tasks, then Continue.
Step 7 of 18
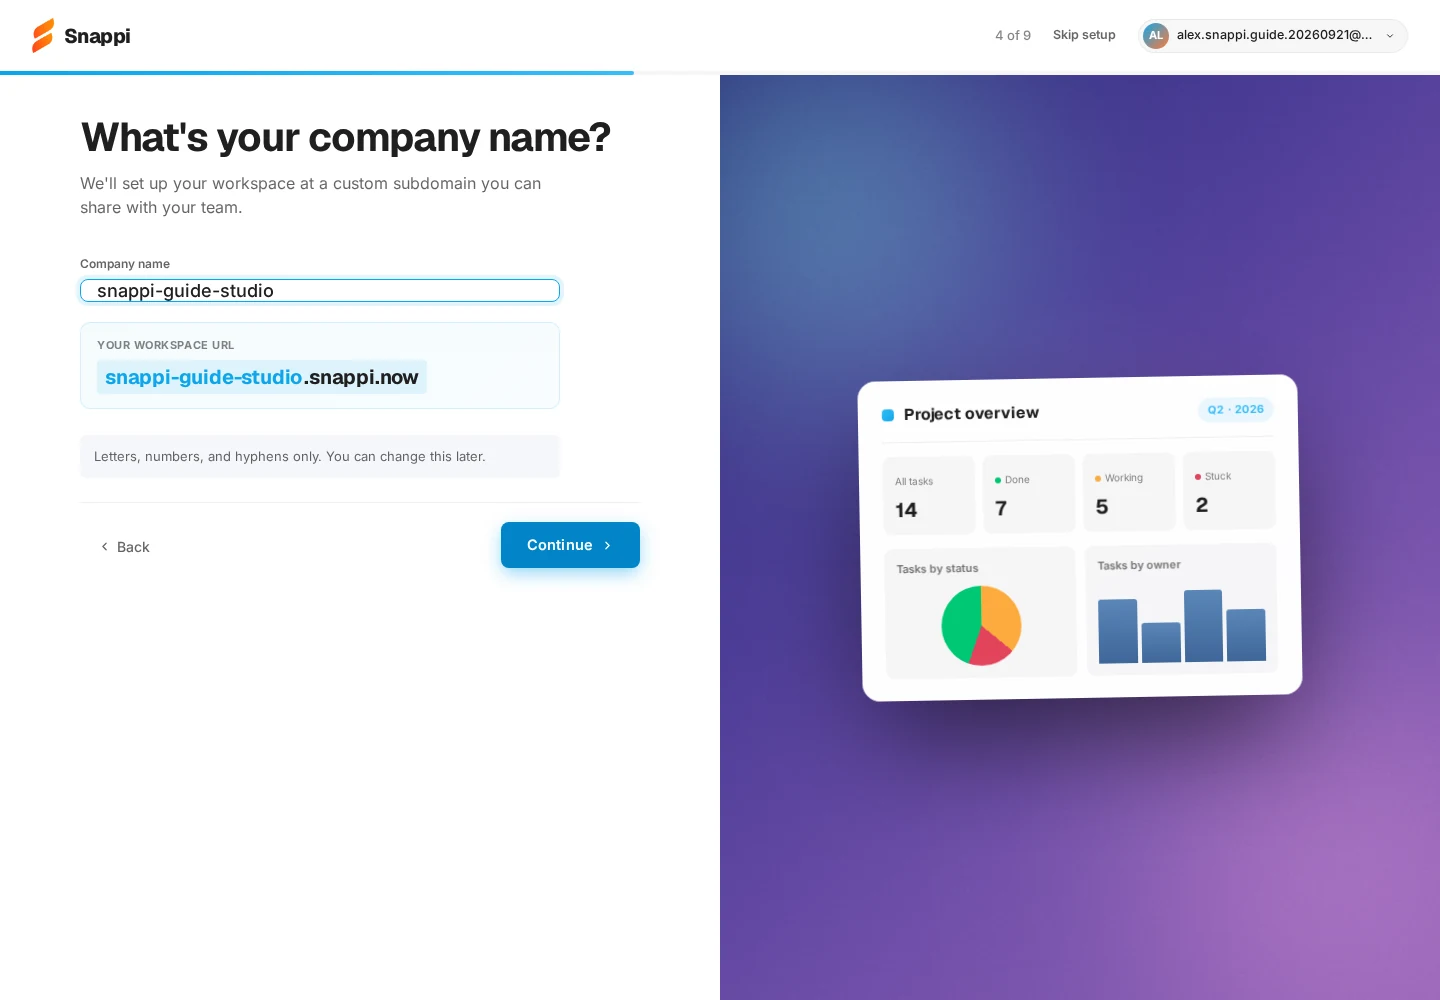
Set your workspace address
Enter a company or workspace name using letters, numbers and hyphens. Wait for the available indicator and check the resulting .snappi.now address before continuing. Our example is snappi-guide-studio.
Step 8 of 18
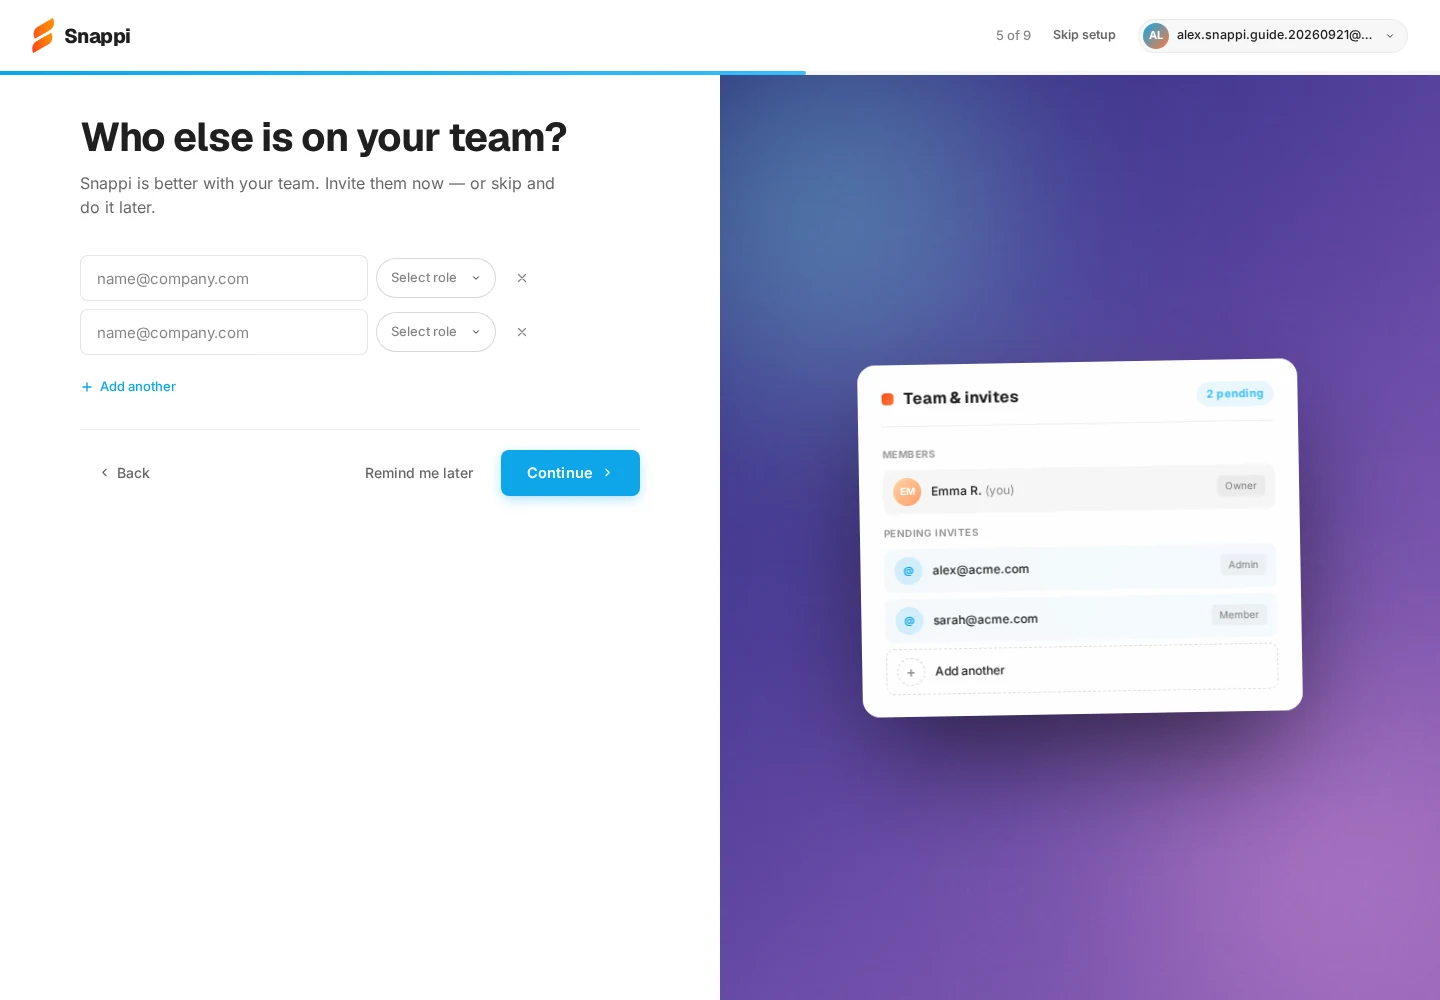
Invite your team, or continue alone
Enter your teammates’ email addresses and choose appropriate roles, or choose Remind me later to continue alone. You can invite people later. No invitations were sent for this example.
Step 9 of 18
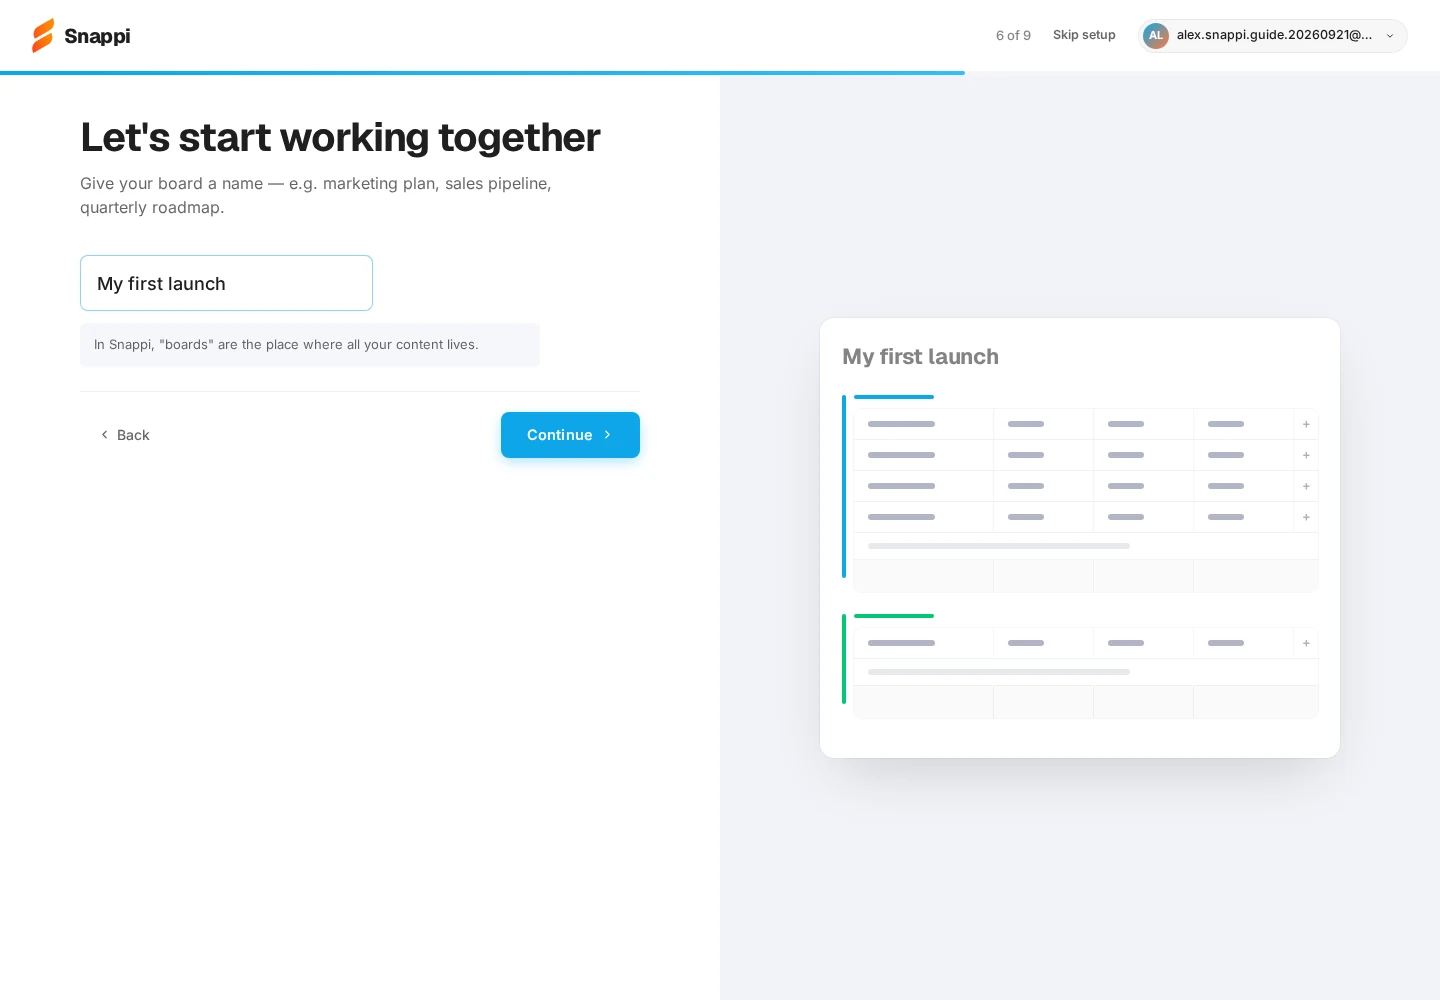
Name your first project
Enter a clear board name. A board holds the tasks for your project. We used My first launch. Select Continue.
Step 10 of 18
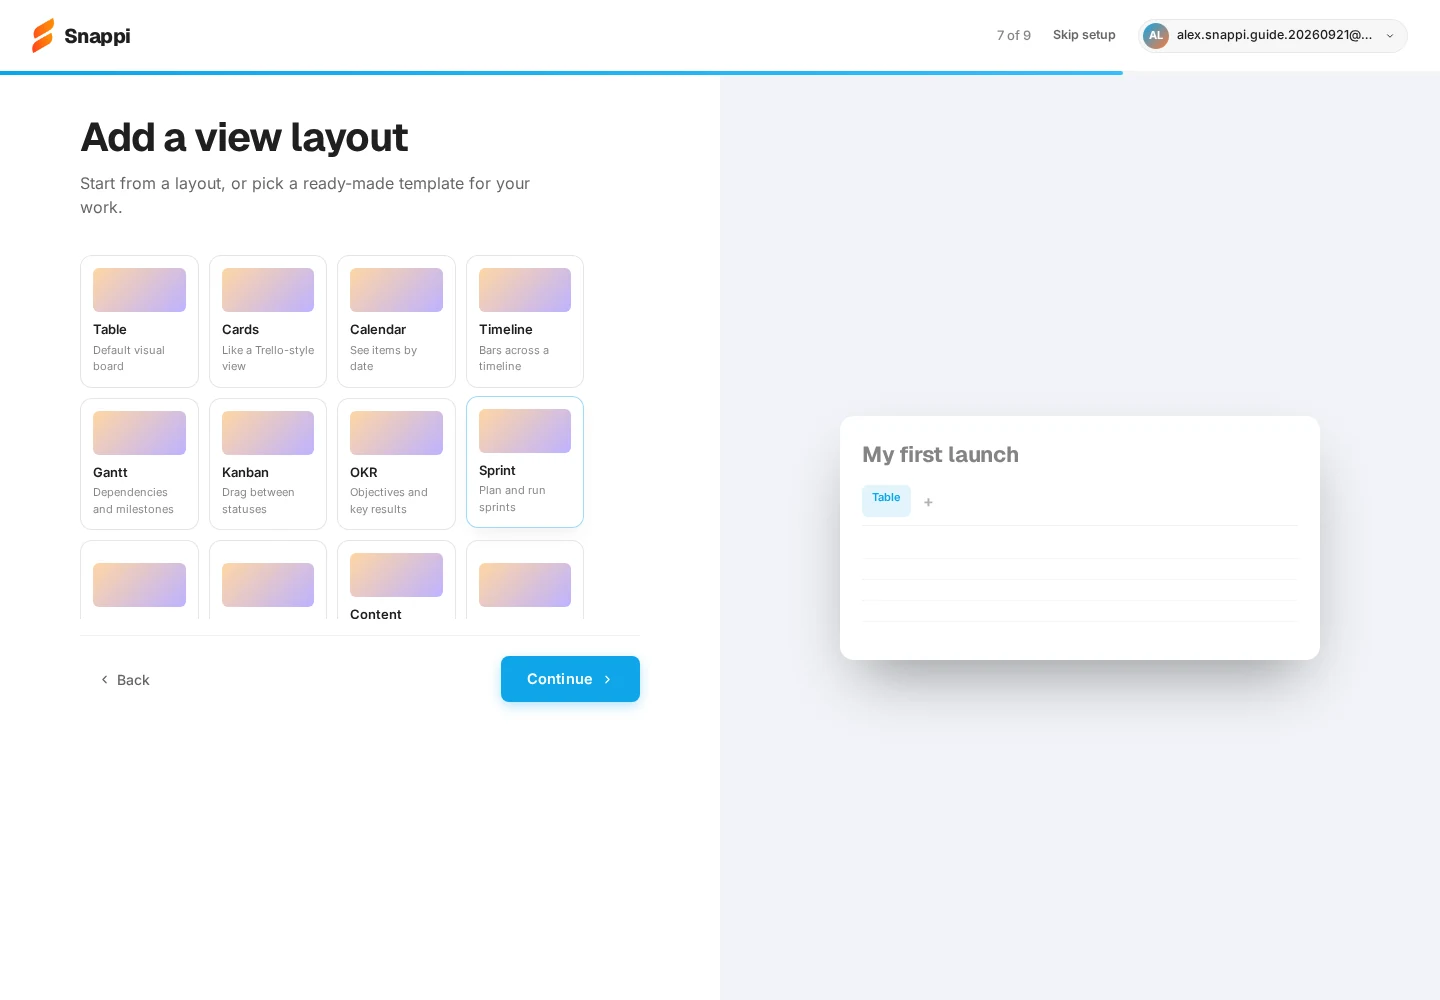
Choose a starting view
Choose Table for a straightforward task list, then Continue. You can add other views later without recreating tasks.
Step 11 of 18
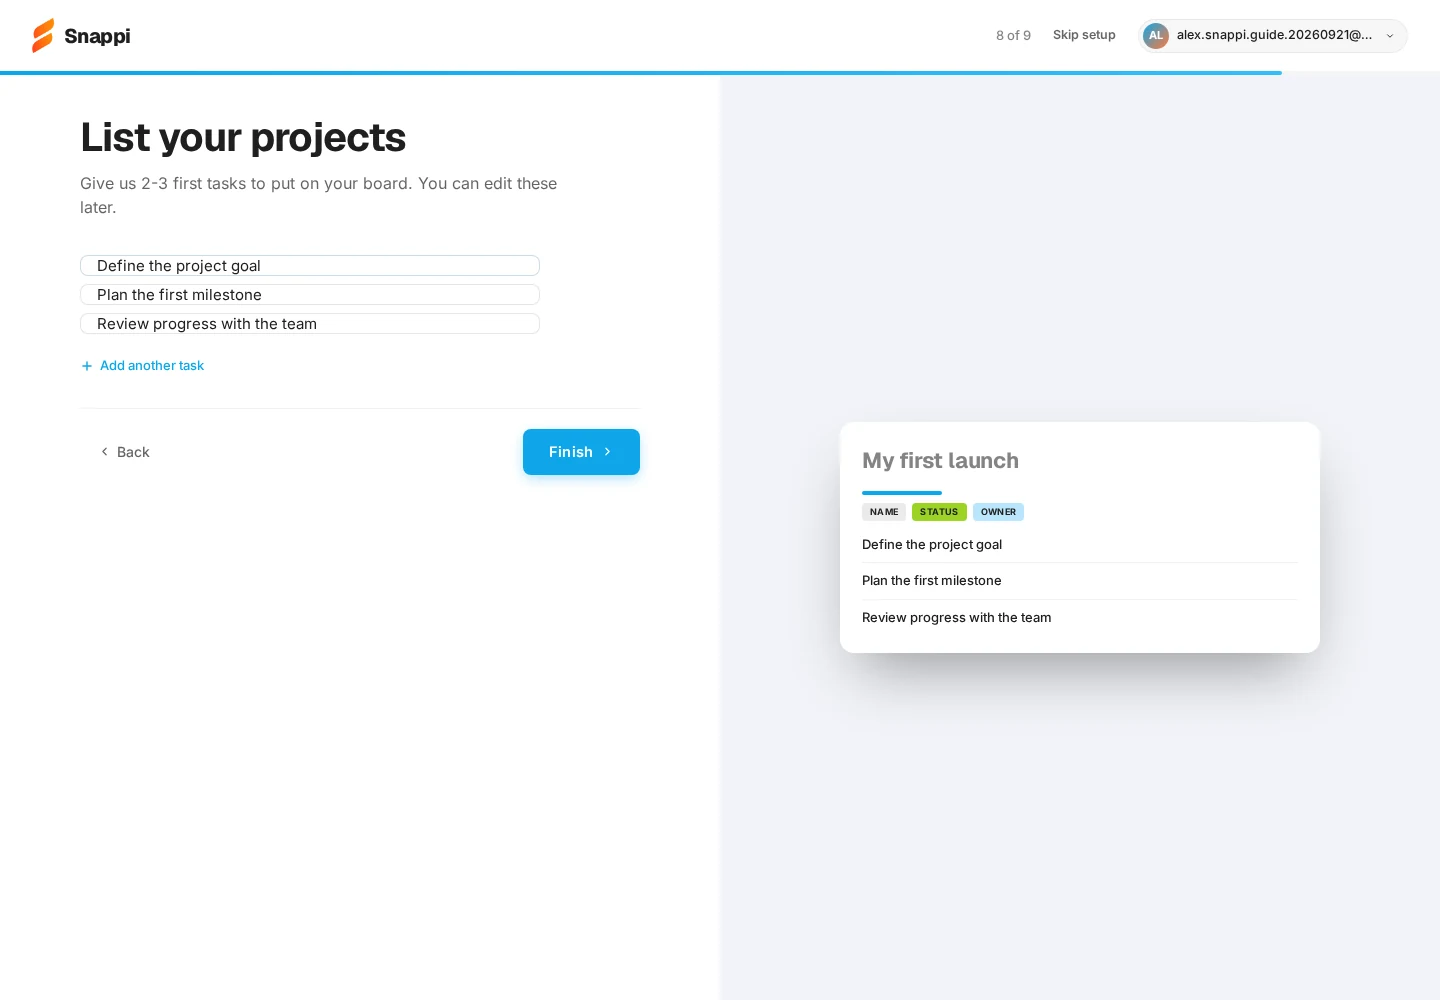
Add your initial tasks
Enter your first tasks, one per field. The example defines a project goal, plans a milestone and reviews progress. Select Finish and wait while Snappi prepares your workspace.
Step 12 of 18
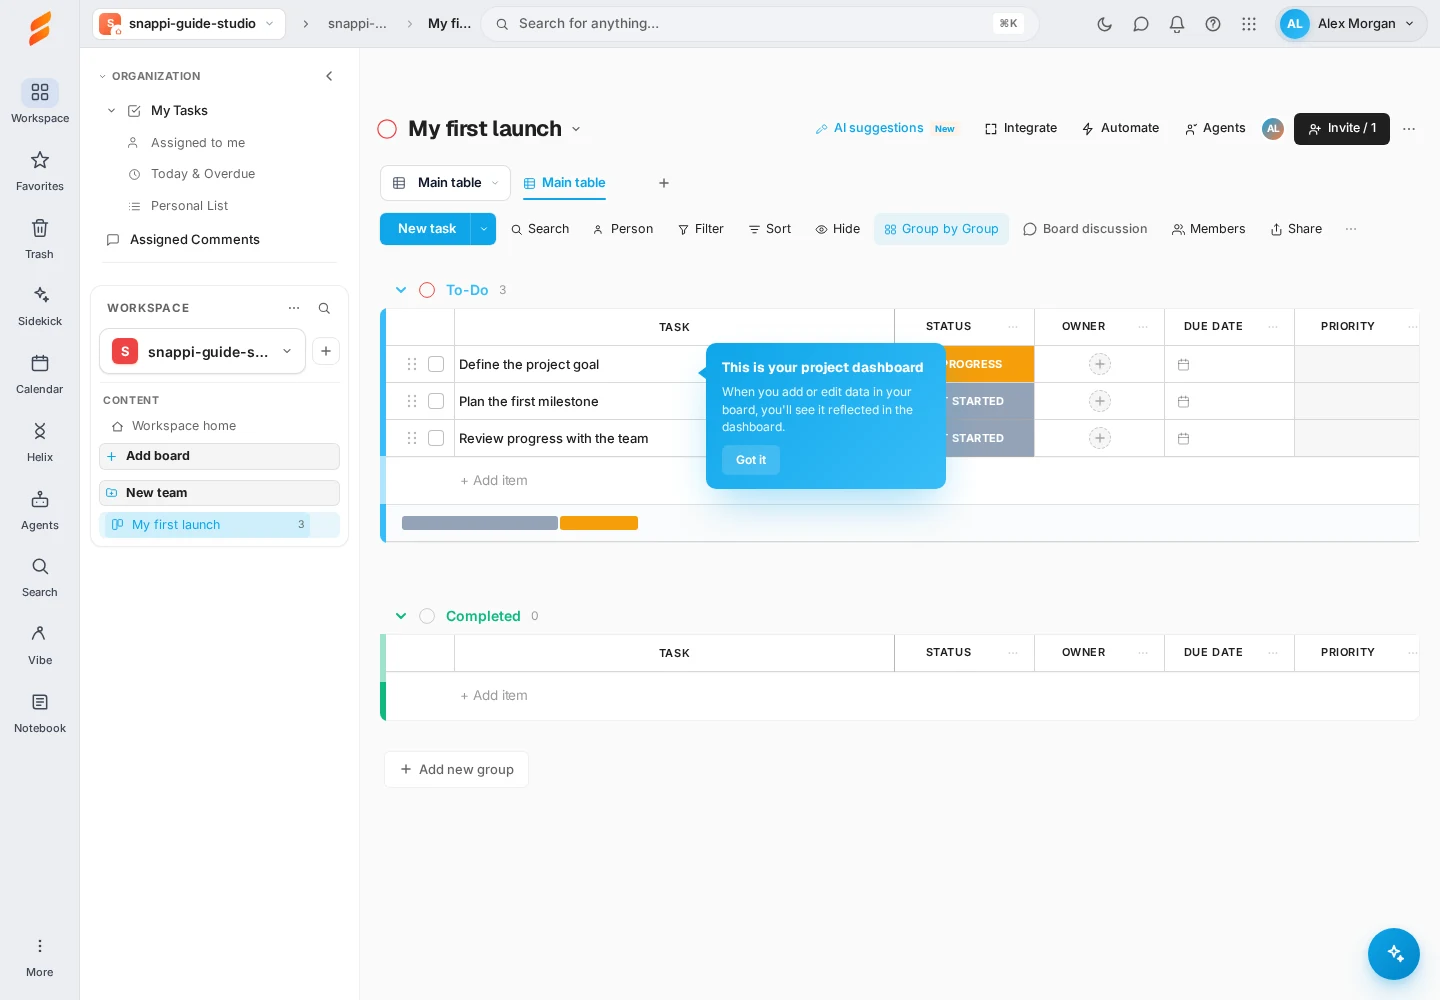
Enter your workspace
Your first board opens with the tasks you entered. Read the introductory message and choose Got it to dismiss it. The left sidebar lets you return to your board.
Step 13 of 18
Read your task table
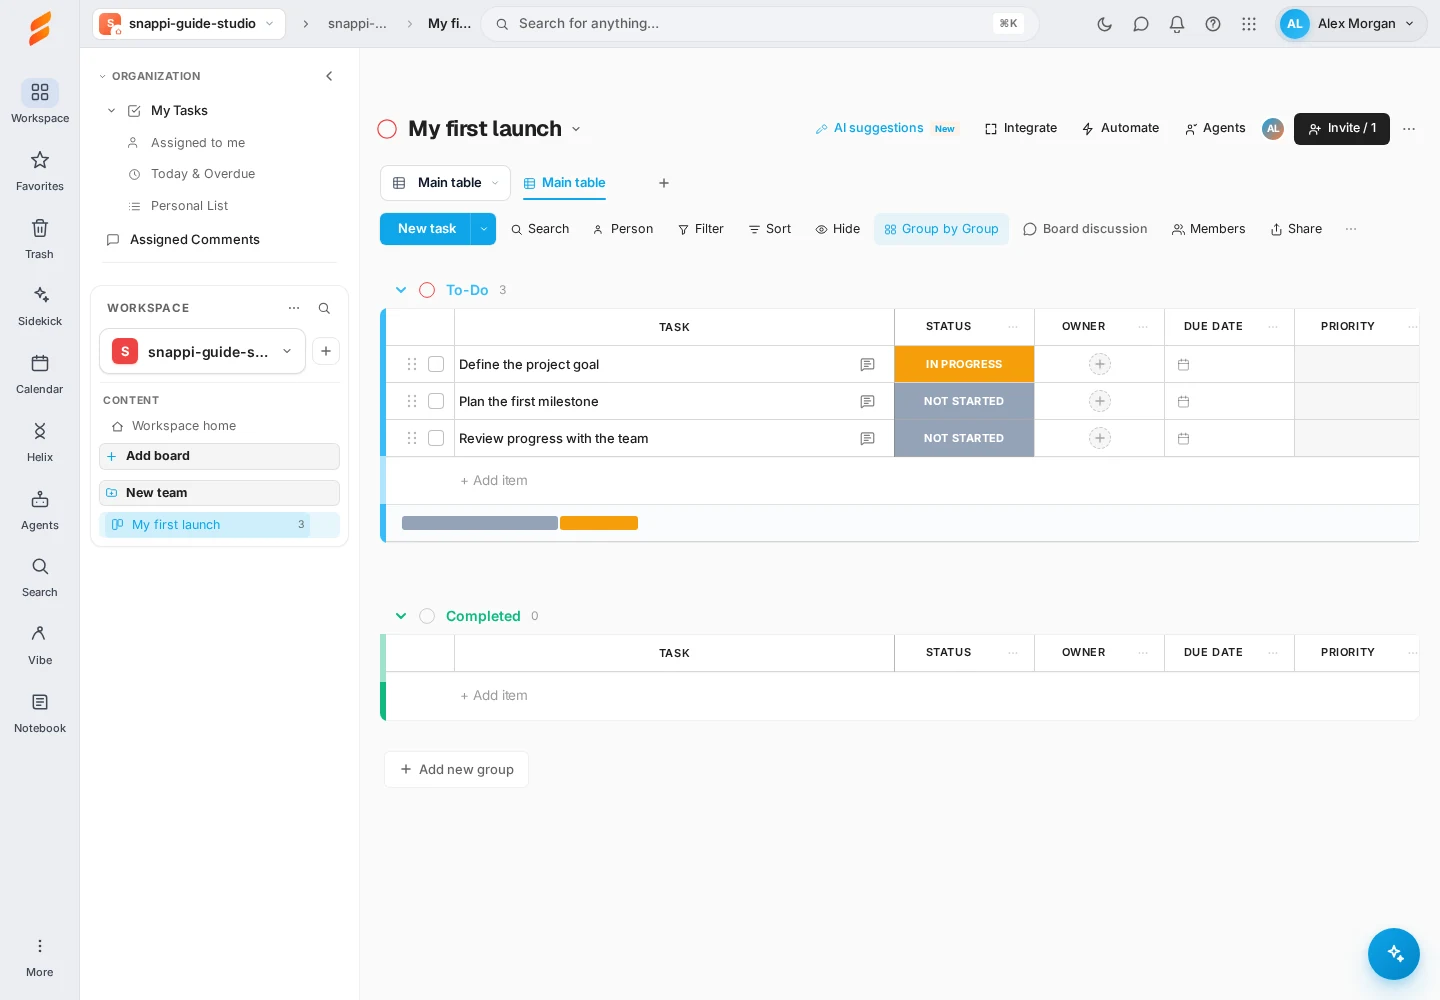
Each row is a task. The starting board includes Status, Owner, Due date and Priority columns. The To-Do and Completed groups organize work.
Step 14 of 18
Add another task
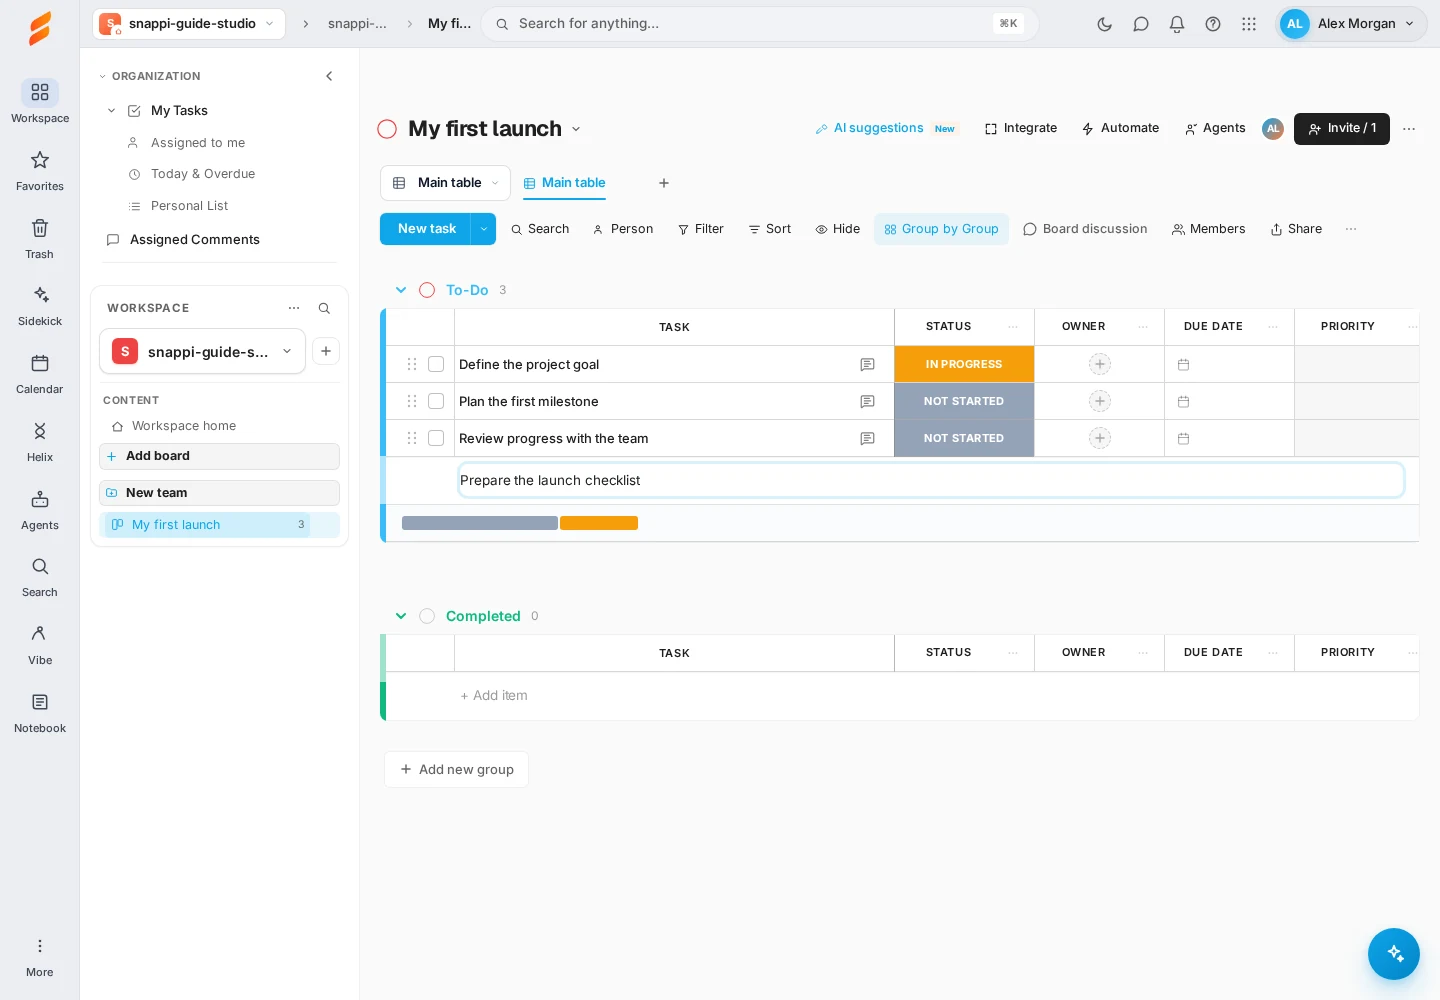
Click + Add item in the relevant group, type a task name and press Enter. We added Prepare the launch checklist. New tasks may have no status until you choose one.
Step 15 of 18
Update a task’s status
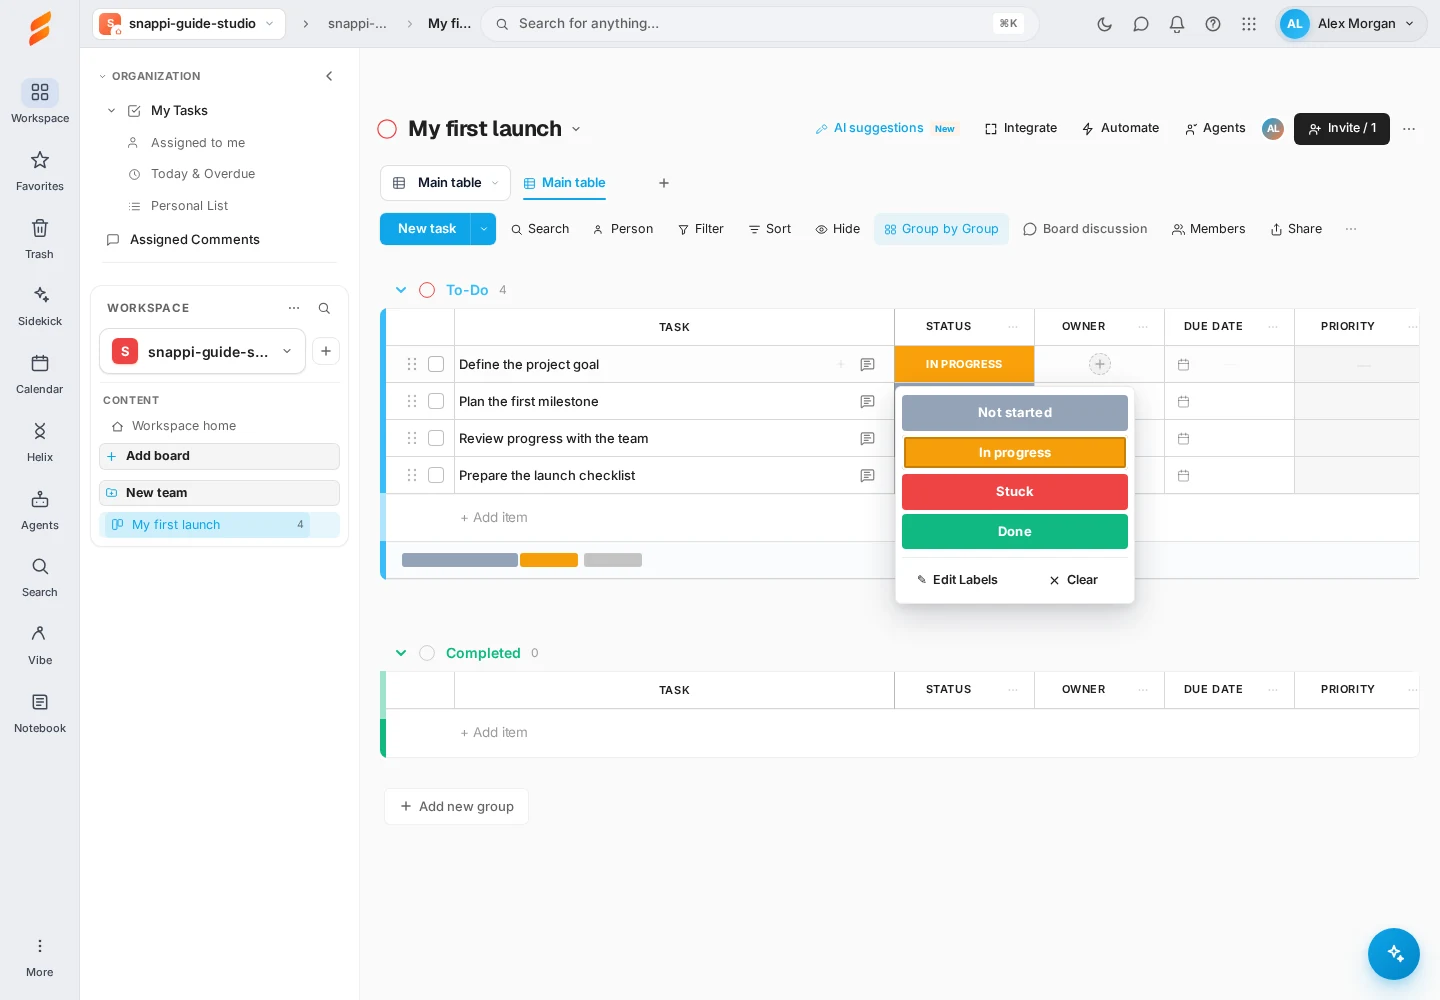
Click a Status cell and choose the current state. This board offers Not started, In progress, Stuck and Done. We selected Done for Define the project goal.
Step 16 of 18
Check the saved result
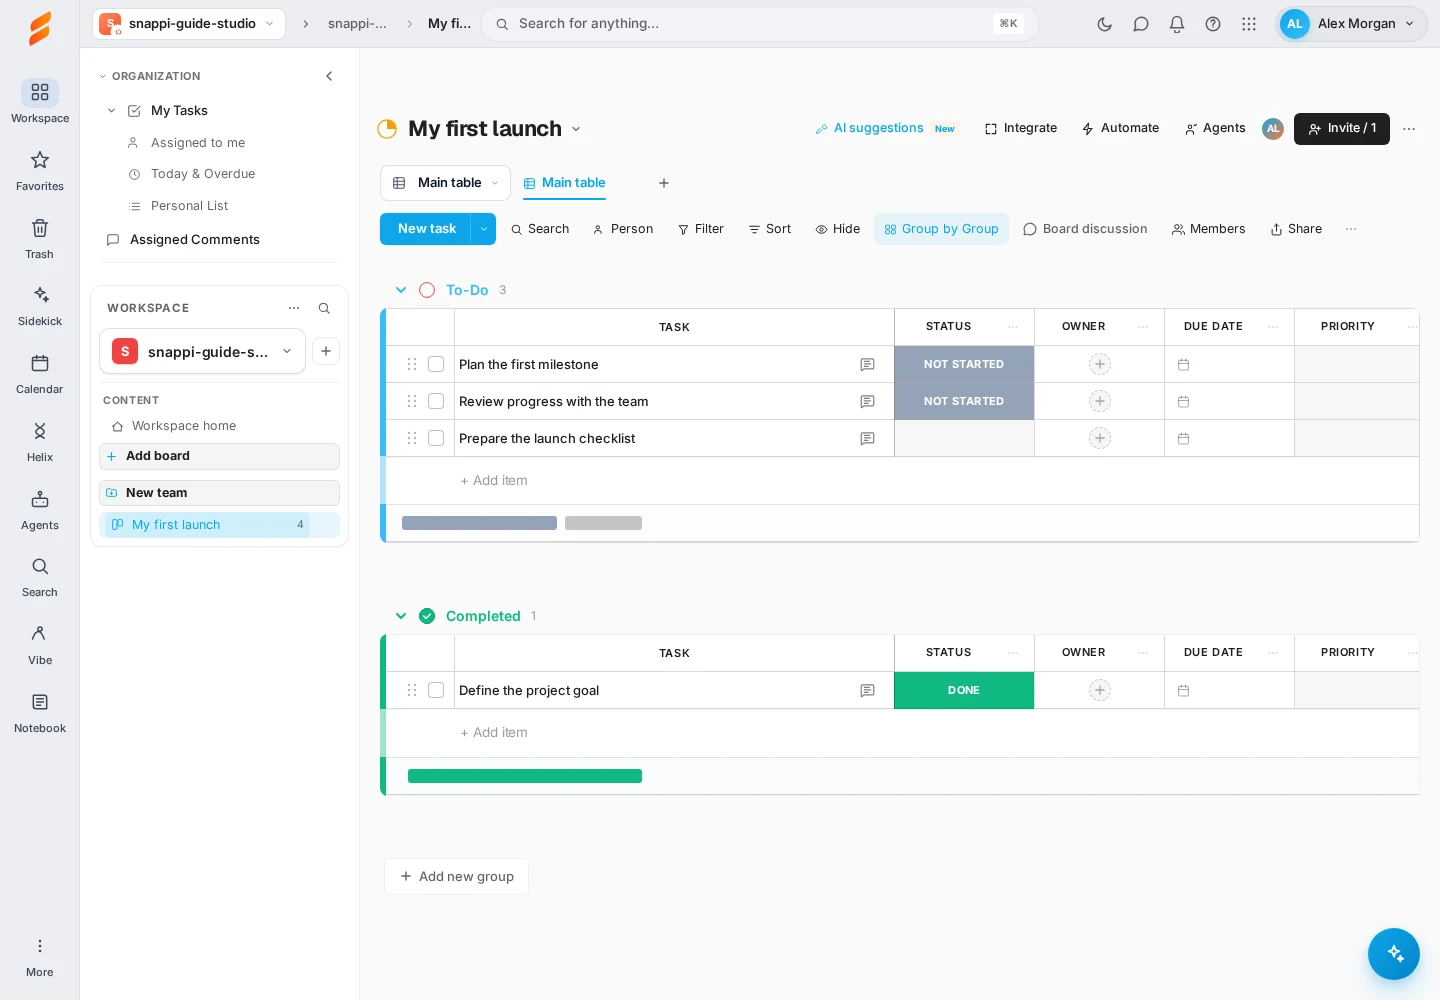
The task now appears in the Completed group with a Done status. Check that your update appears before moving on.
Step 17 of 18
Add a Kanban view
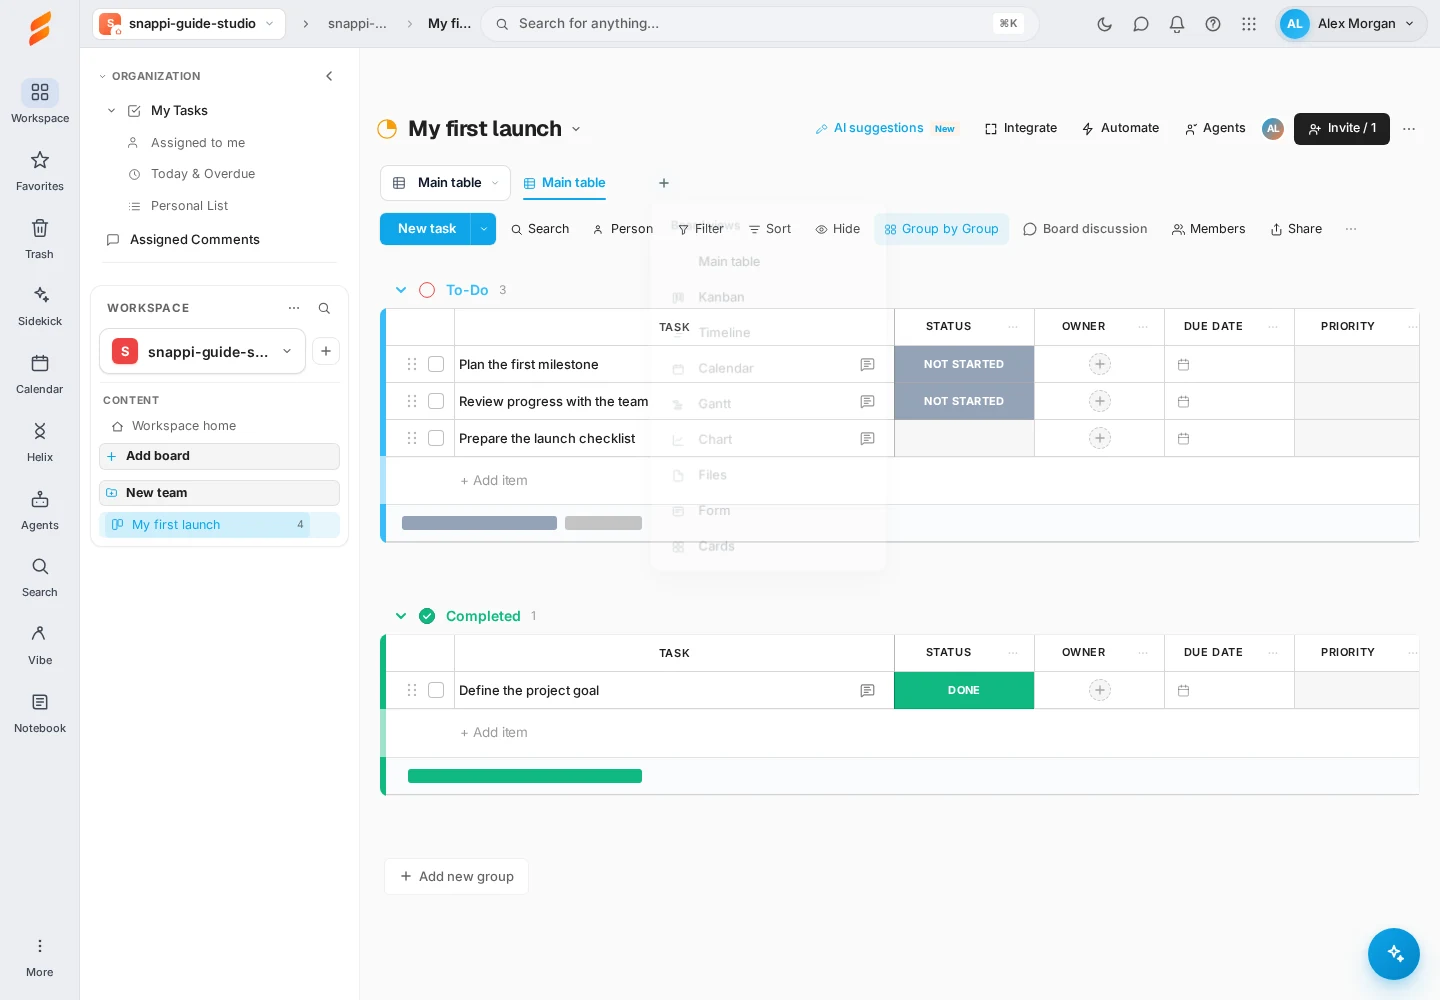
Choose the plus button beside your view tabs (Add view), then select Kanban from Board views.
Step 18 of 18
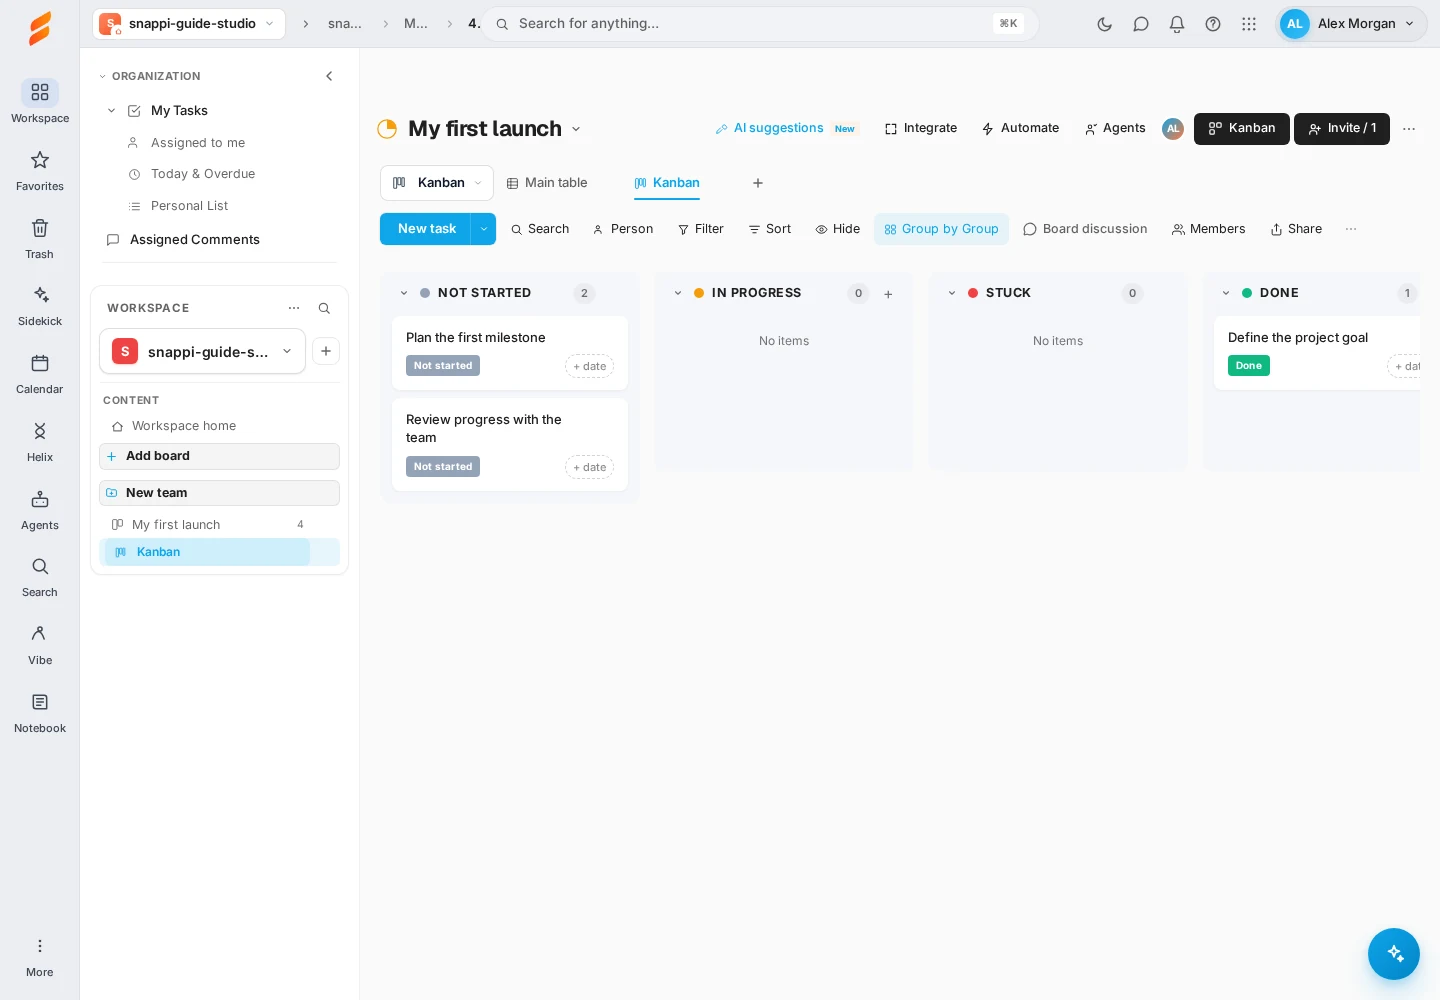
Review the same tasks in Kanban
Kanban shows the same four tasks in status columns. The completed task appears under Done; the new task without a status appears under Unassigned. Switch back to Main table whenever you prefer the list.
Need a hand?
I haven’t received my code
Check your spam folder and confirm your email address. Choose Send a new code. If a delivery error persists, contact us.
Signup reports suspicious traffic
Try again in your usual browser and network. If you still cannot sign up, contact us with the error message. Never share your password or verification code.
Where do I return to my workspace?
Log in with the sign-in method you used to register. Use the workspace navigation to open your board.
Keep exploring
Make your board work your way